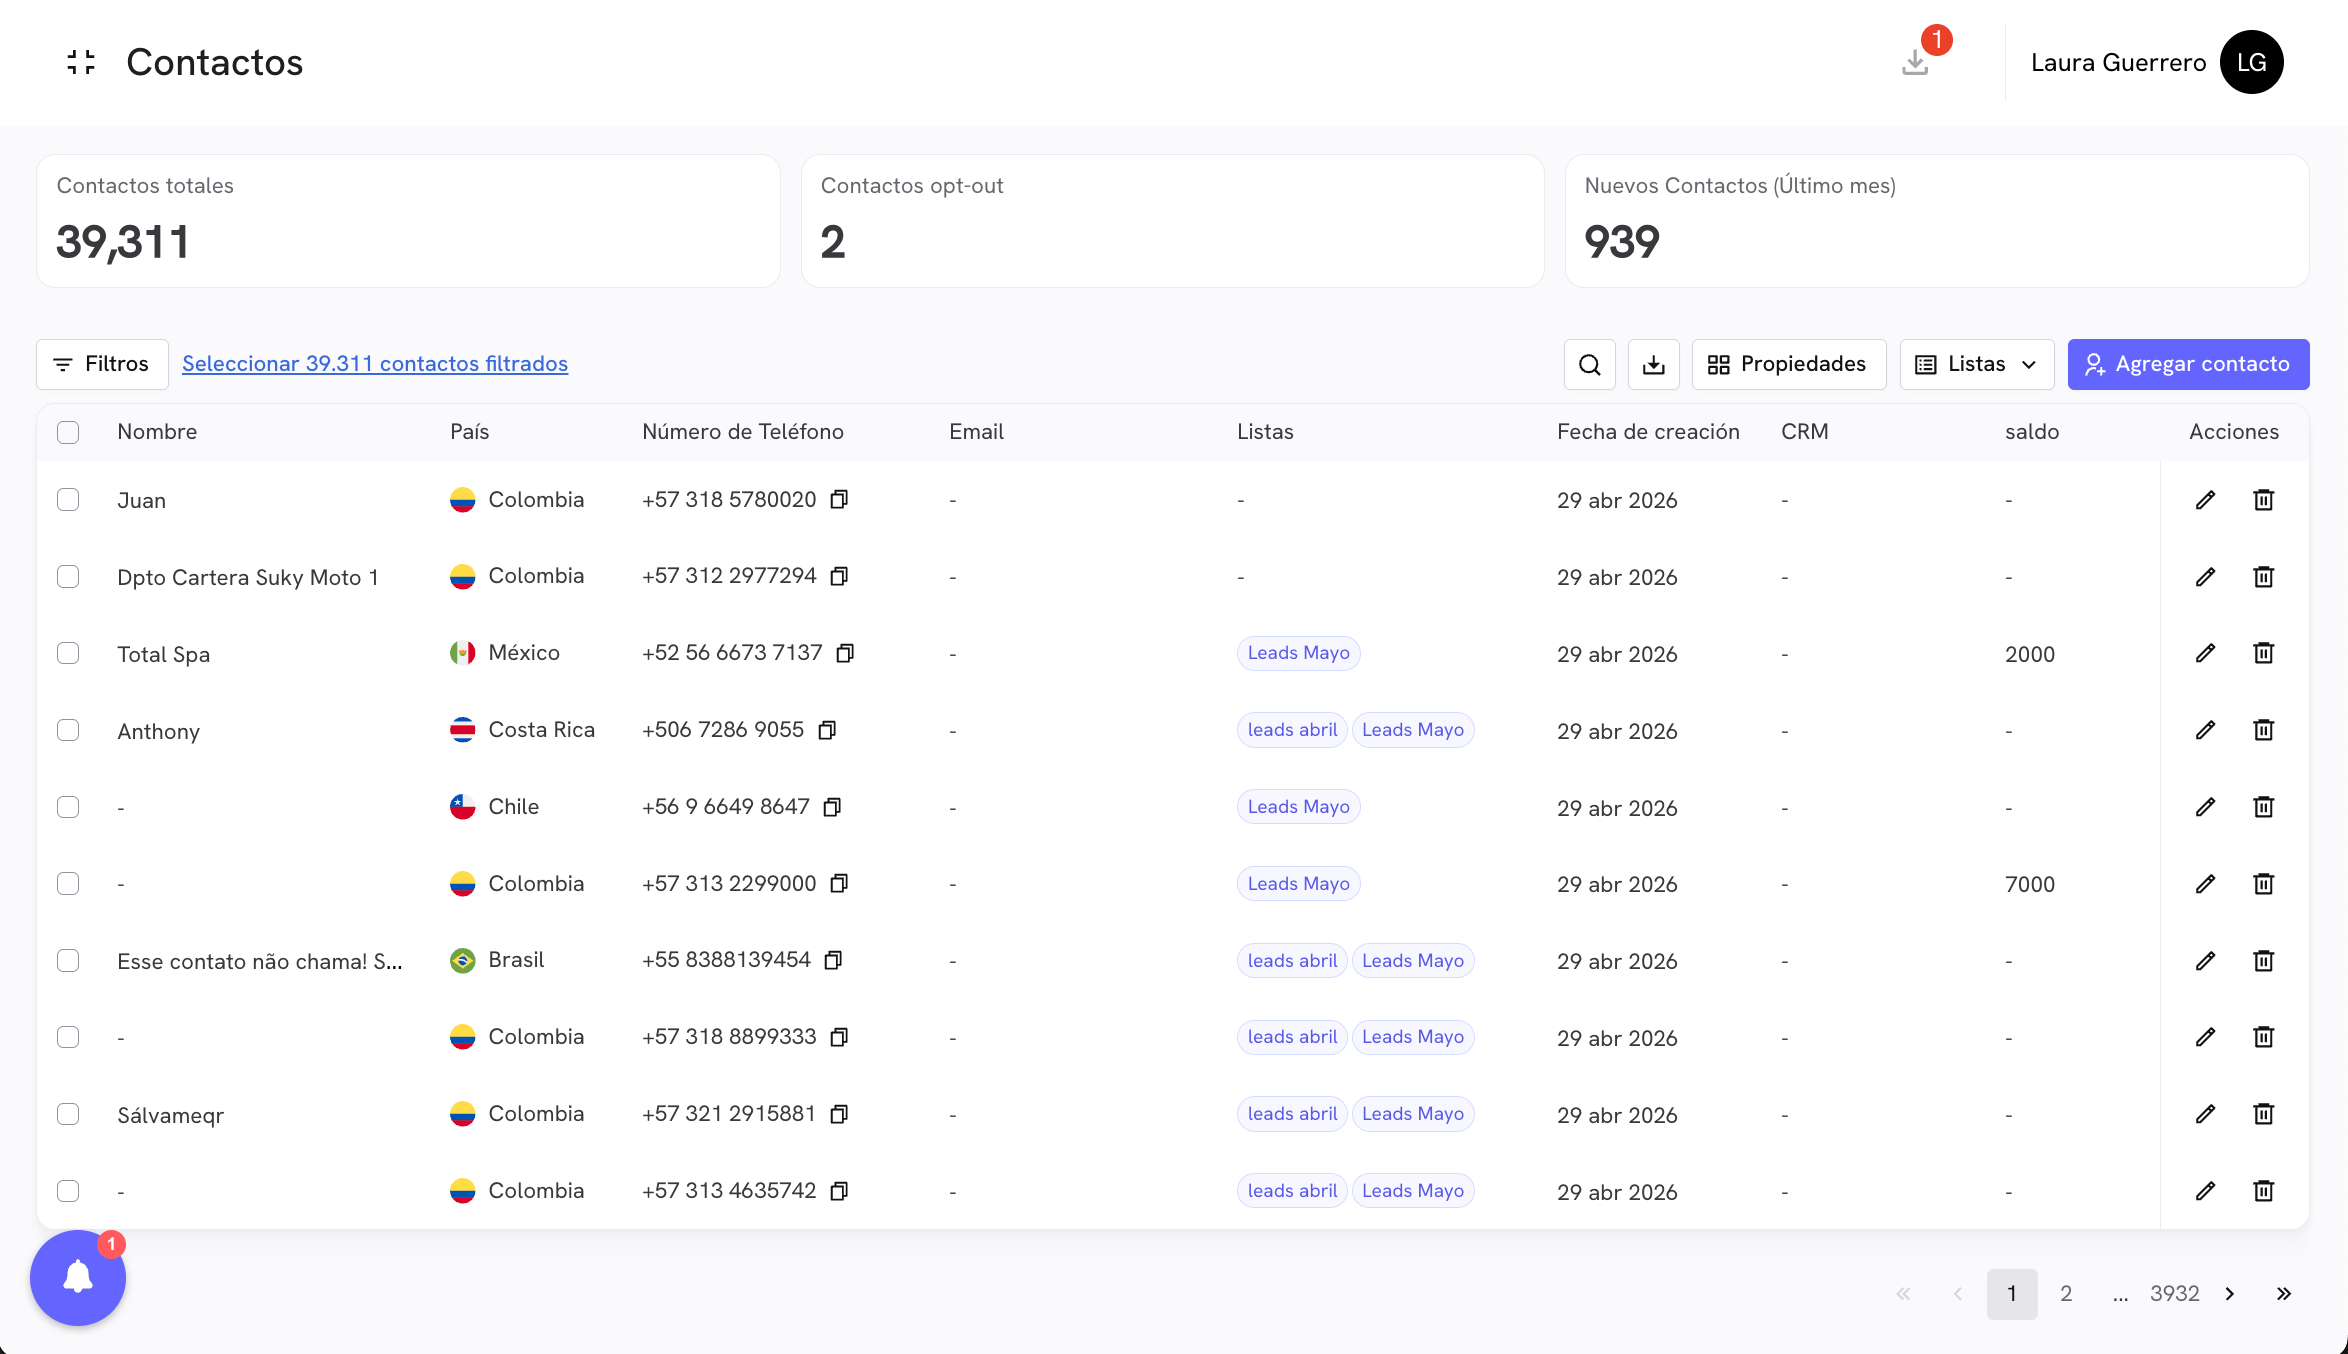
 At the top of the section you will find three key metrics:
* **Total Contacts**: the total number of contacts registered in your account.
* **Opt-out Contacts**: contacts who have requested to stop receiving messages.
* **New Contacts (last month)**: contacts created in the last 30 days, useful for measuring the growth of your base.
***
## Adding a contact
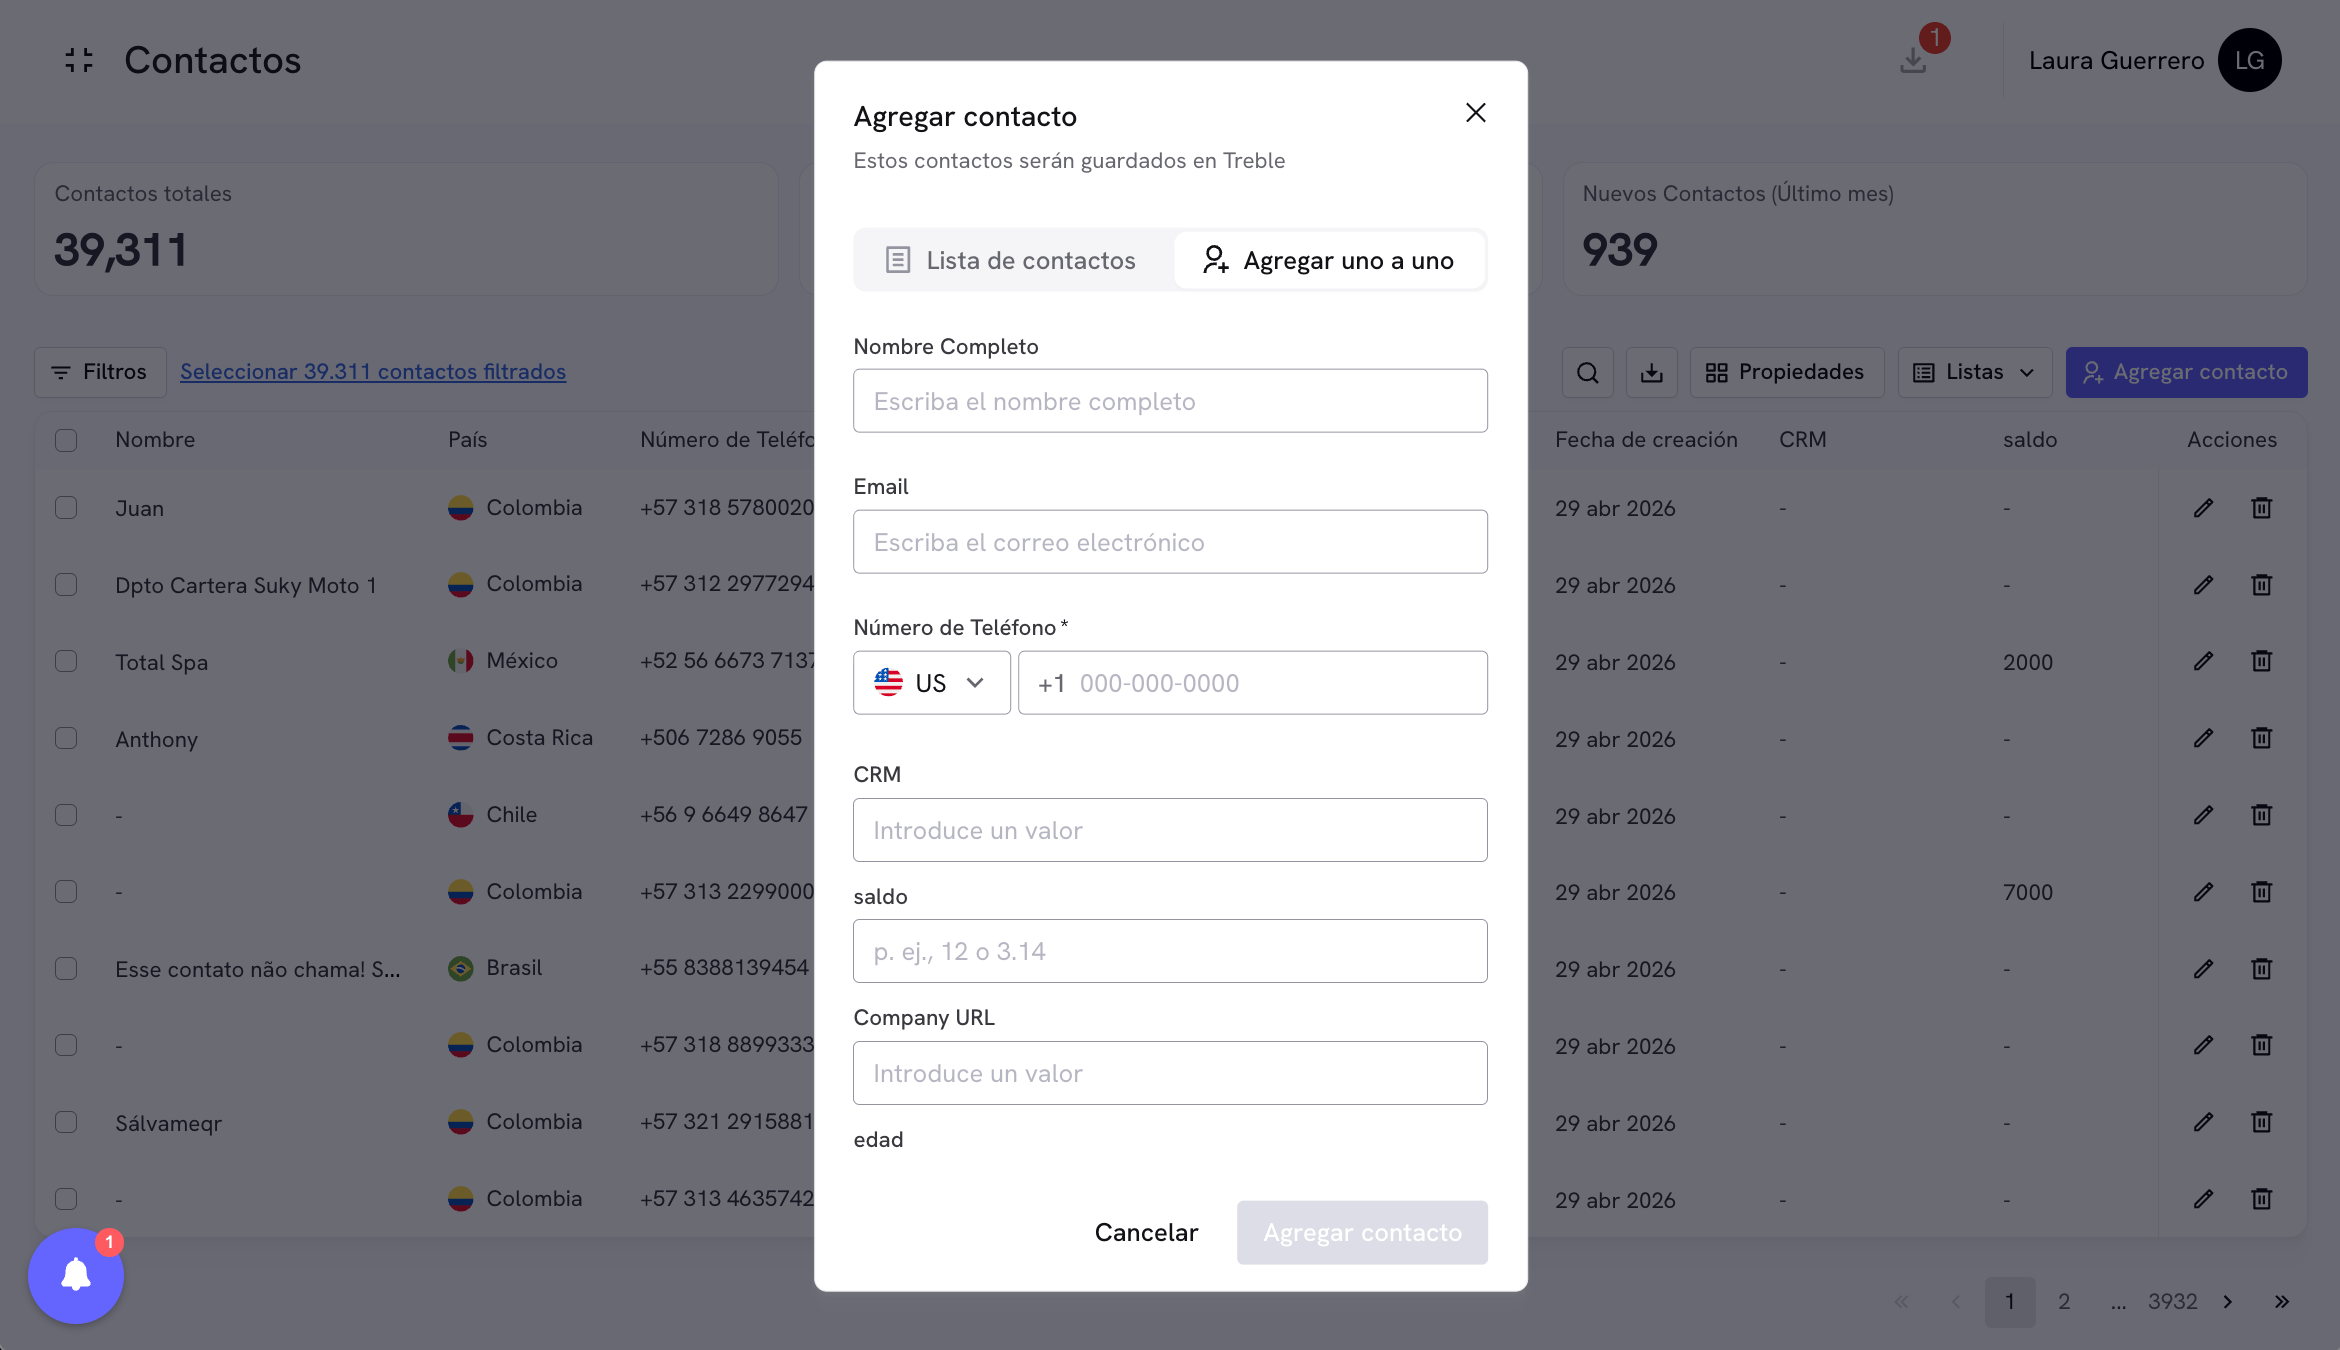
You can add contacts in two ways: one by one or by uploading a CSV file. Click the **Add contact** button in the top right corner to access both options.
### Add one by one
Fill in the form with the contact's details:
* **Full Name**: the contact's name.
* **Email**: email address.
* **Phone Number**: select the country code and enter the number.
* **Additional properties**: any custom property you have created will appear here as an additional field (for example, CRM, balance, Company URL, age).
At the top of the section you will find three key metrics:
* **Total Contacts**: the total number of contacts registered in your account.
* **Opt-out Contacts**: contacts who have requested to stop receiving messages.
* **New Contacts (last month)**: contacts created in the last 30 days, useful for measuring the growth of your base.
***
## Adding a contact
You can add contacts in two ways: one by one or by uploading a CSV file. Click the **Add contact** button in the top right corner to access both options.
### Add one by one
Fill in the form with the contact's details:
* **Full Name**: the contact's name.
* **Email**: email address.
* **Phone Number**: select the country code and enter the number.
* **Additional properties**: any custom property you have created will appear here as an additional field (for example, CRM, balance, Company URL, age).
 ### Add by CSV
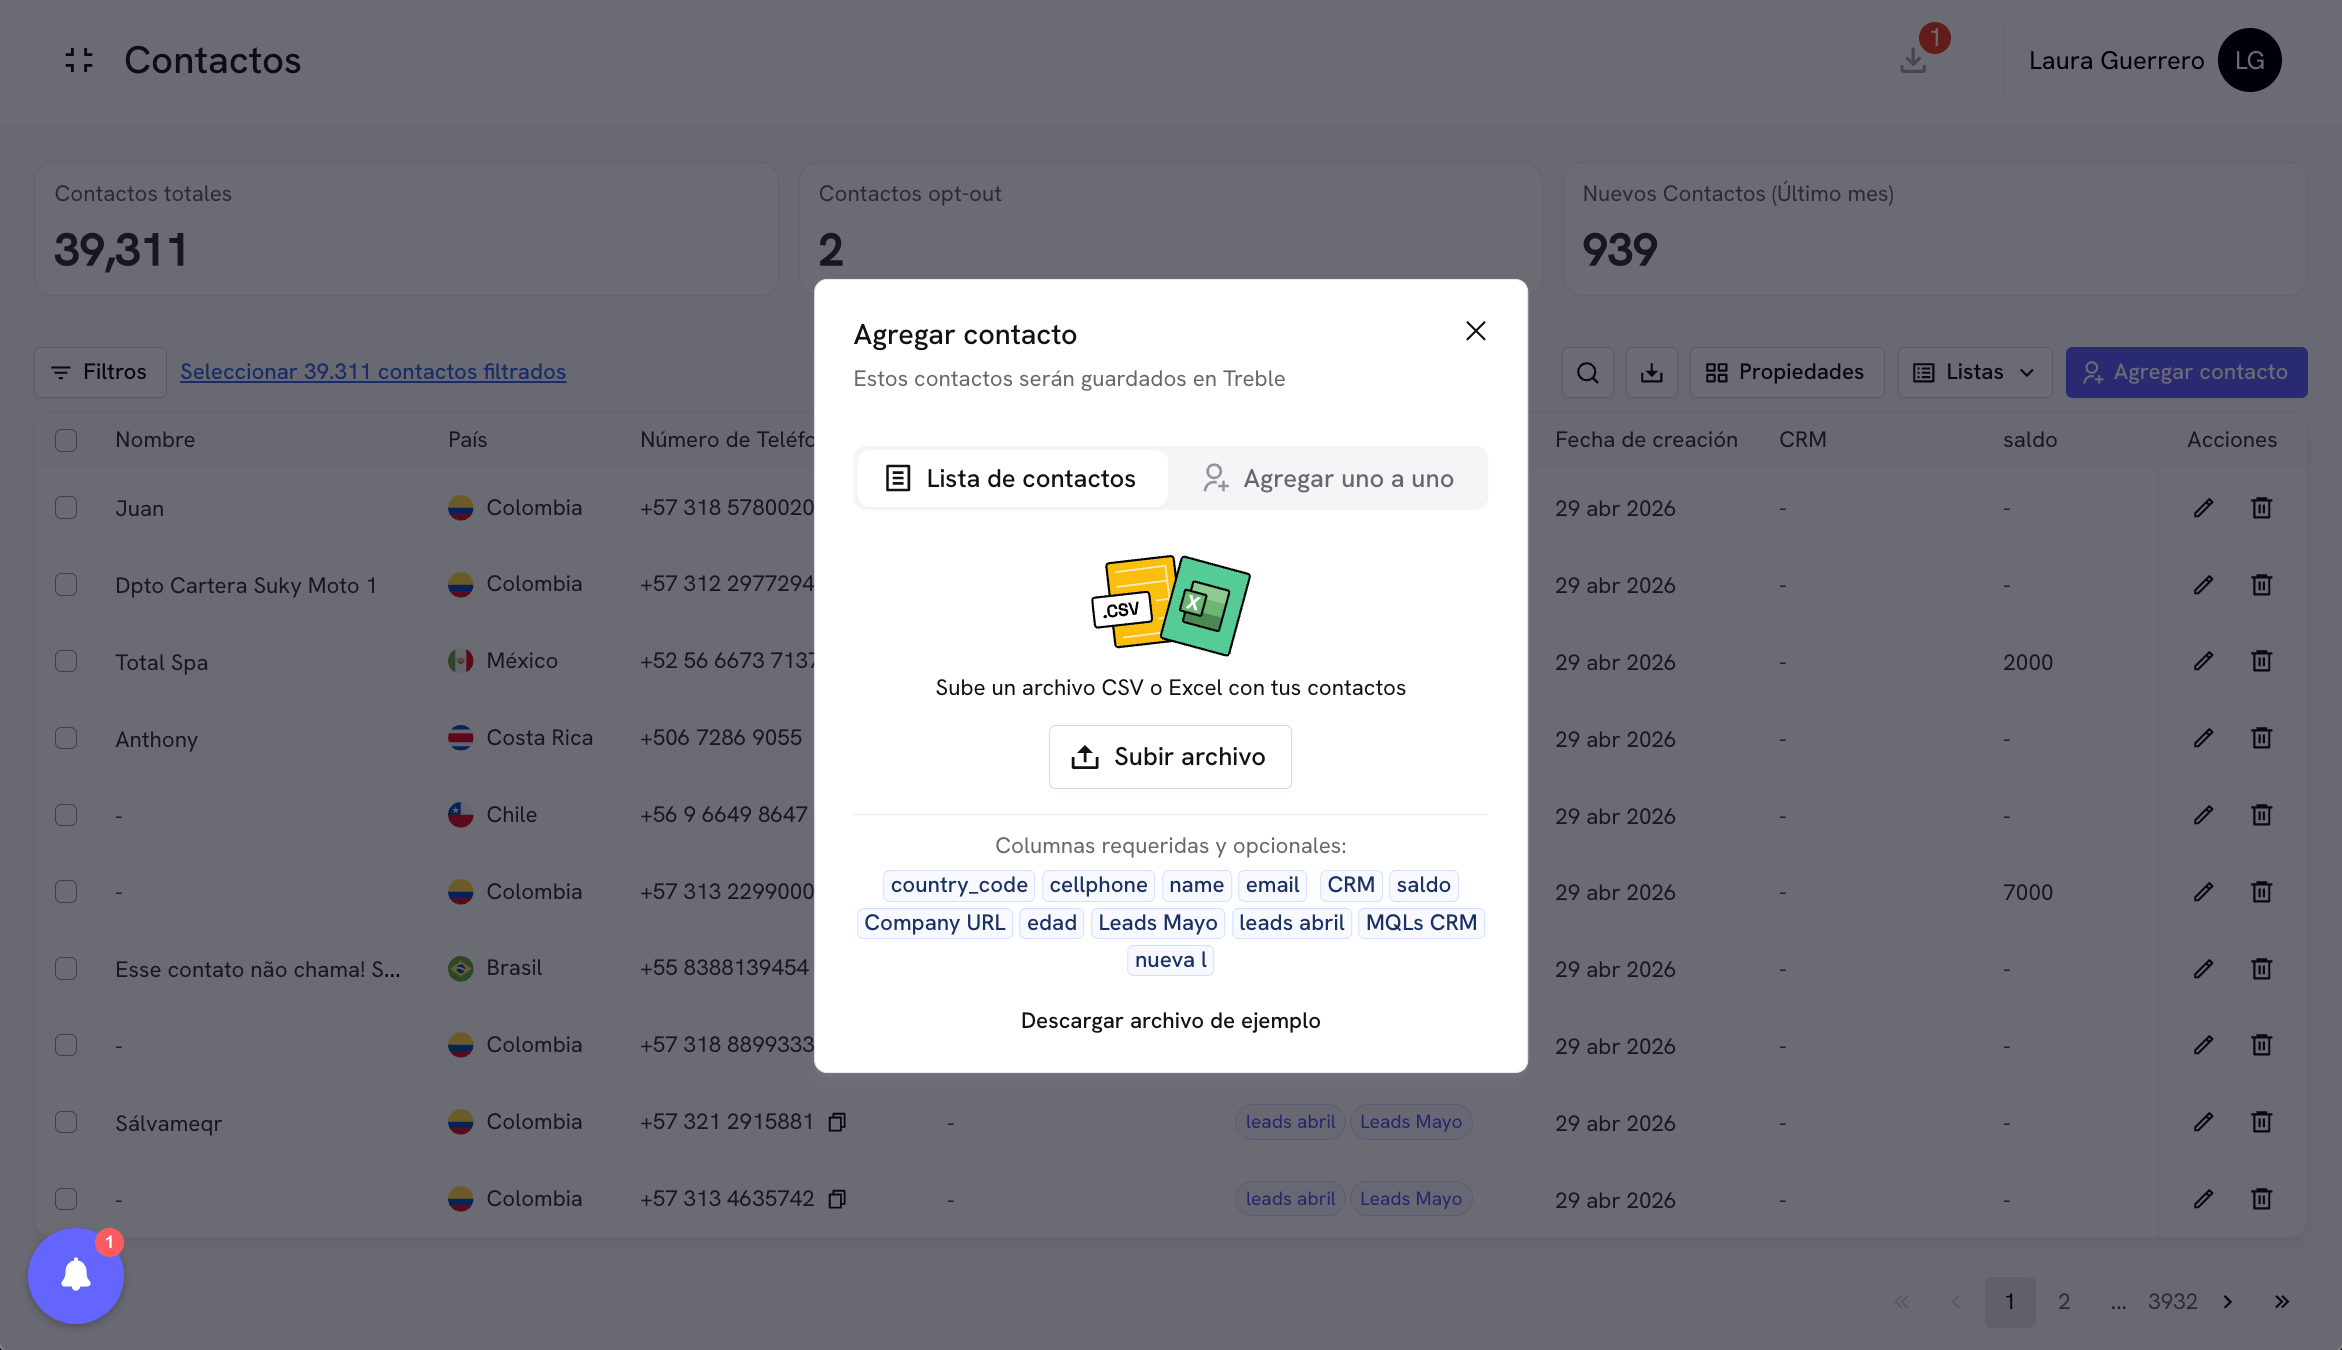
If you need to upload multiple contacts at once, use the **Contact list** tab inside the same modal and click **Upload file**.
The CSV file must contain the required columns. The mandatory columns are `country_code` and `cellphone`. Optional columns include `name`, `email`, and any custom property you have created (for example, `balance`, `Company URL`, `age`, or the name of a list such as `May Leads`).
### Add by CSV
If you need to upload multiple contacts at once, use the **Contact list** tab inside the same modal and click **Upload file**.
The CSV file must contain the required columns. The mandatory columns are `country_code` and `cellphone`. Optional columns include `name`, `email`, and any custom property you have created (for example, `balance`, `Company URL`, `age`, or the name of a list such as `May Leads`).
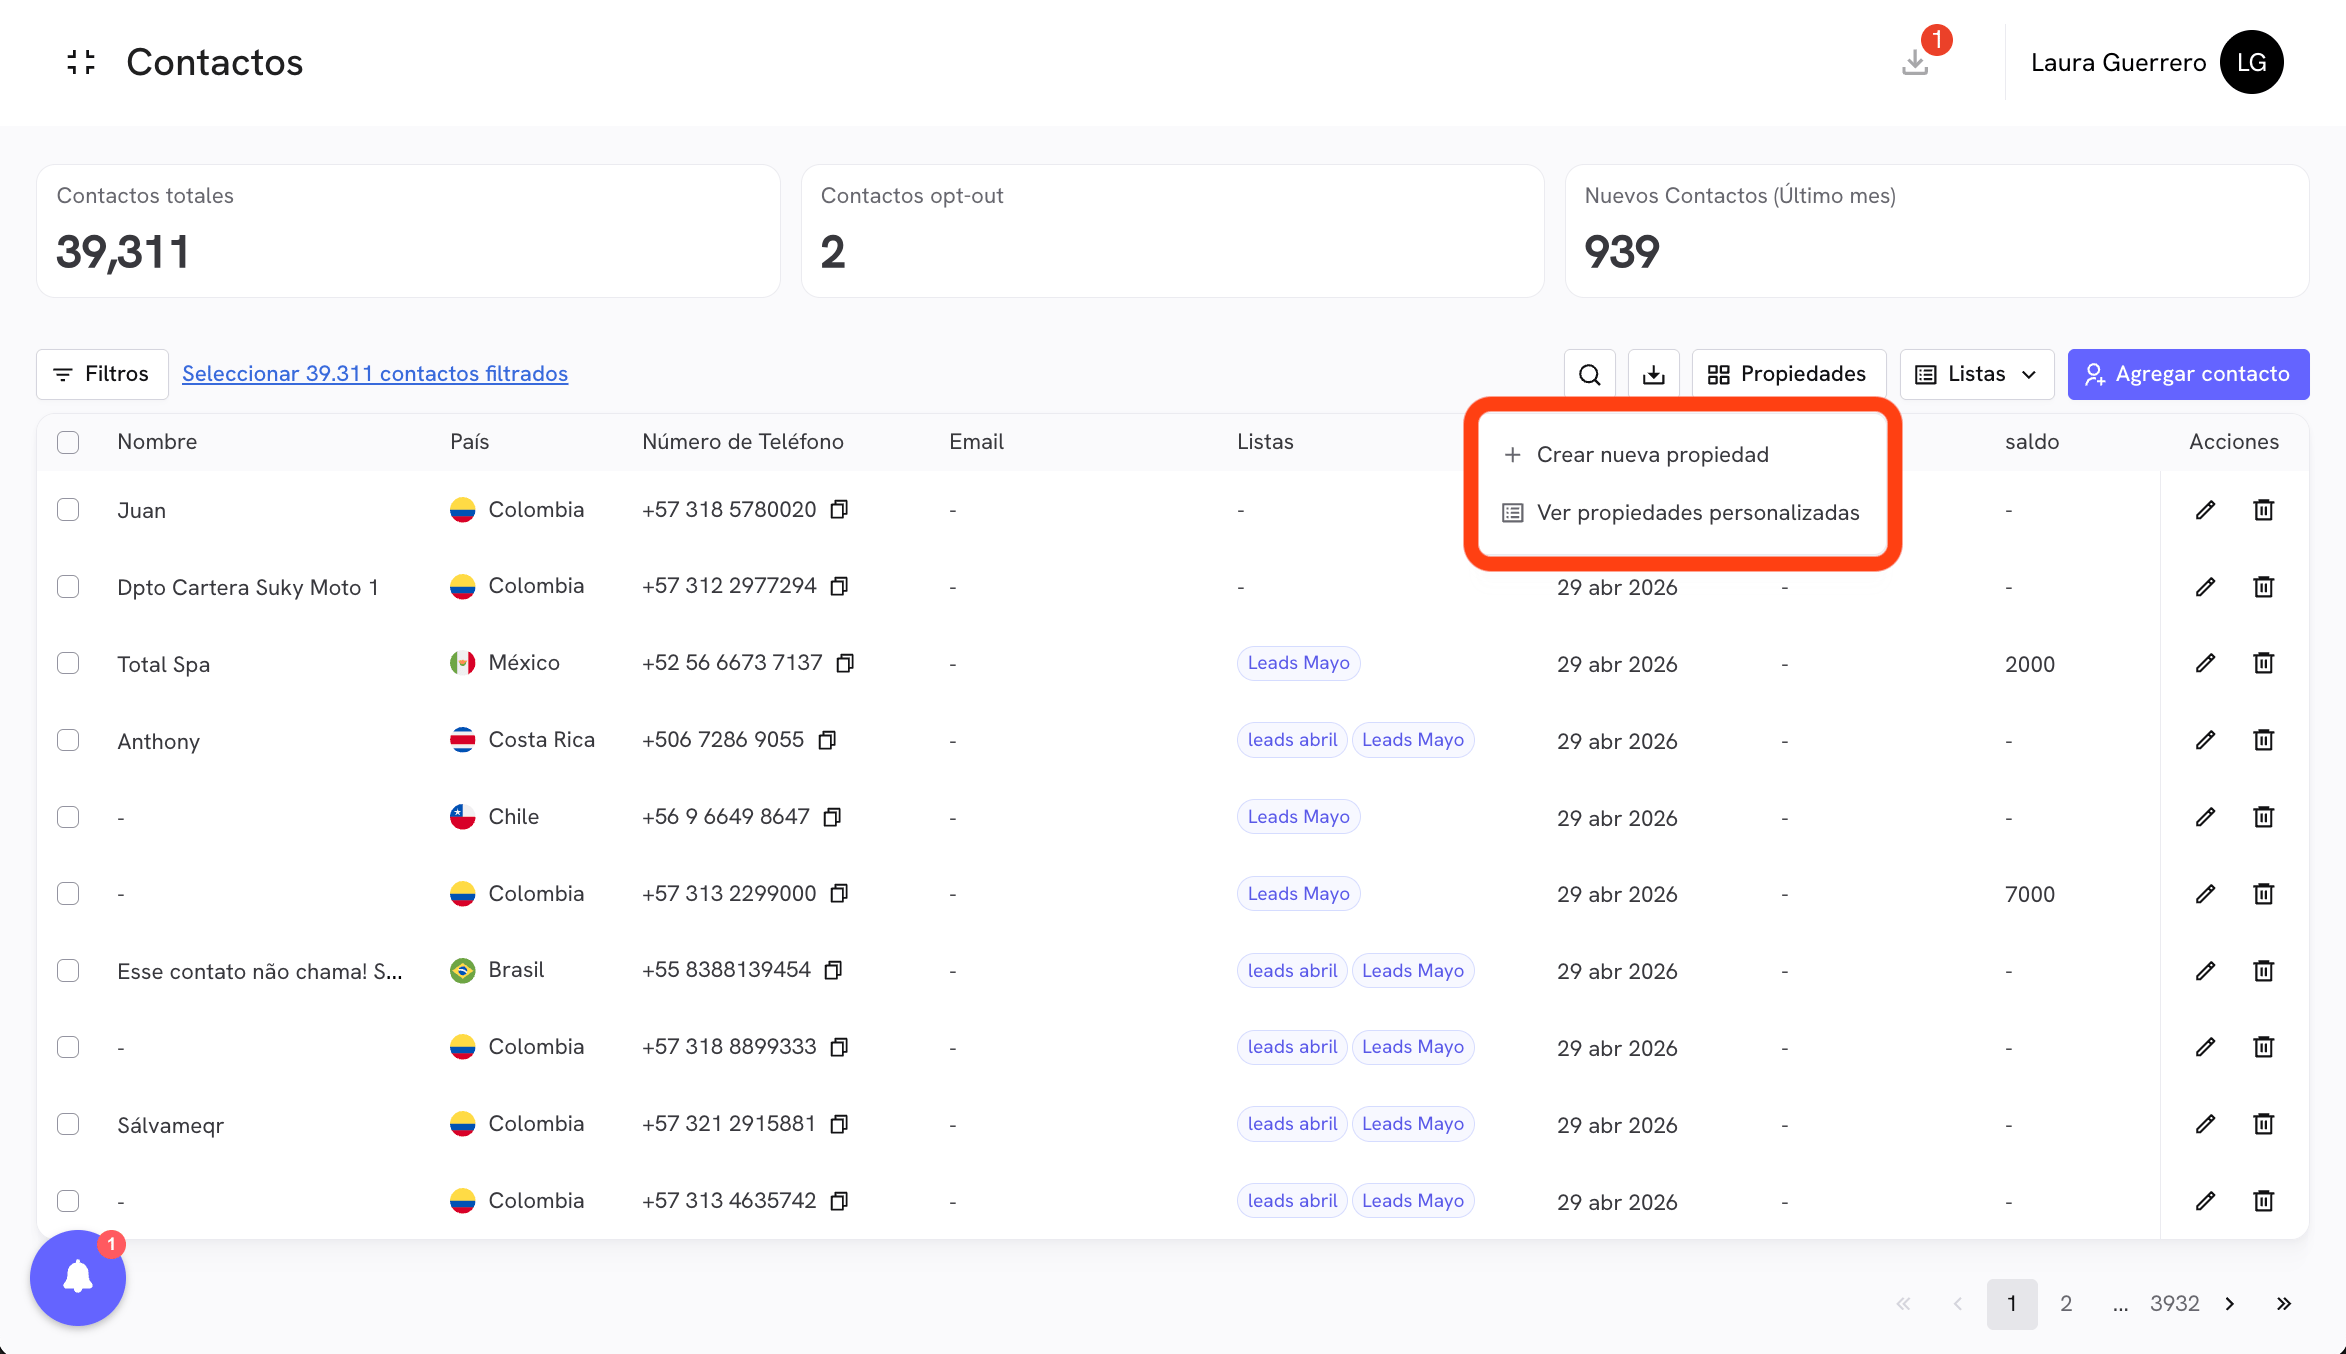 Assign a descriptive name to the property and select its type:
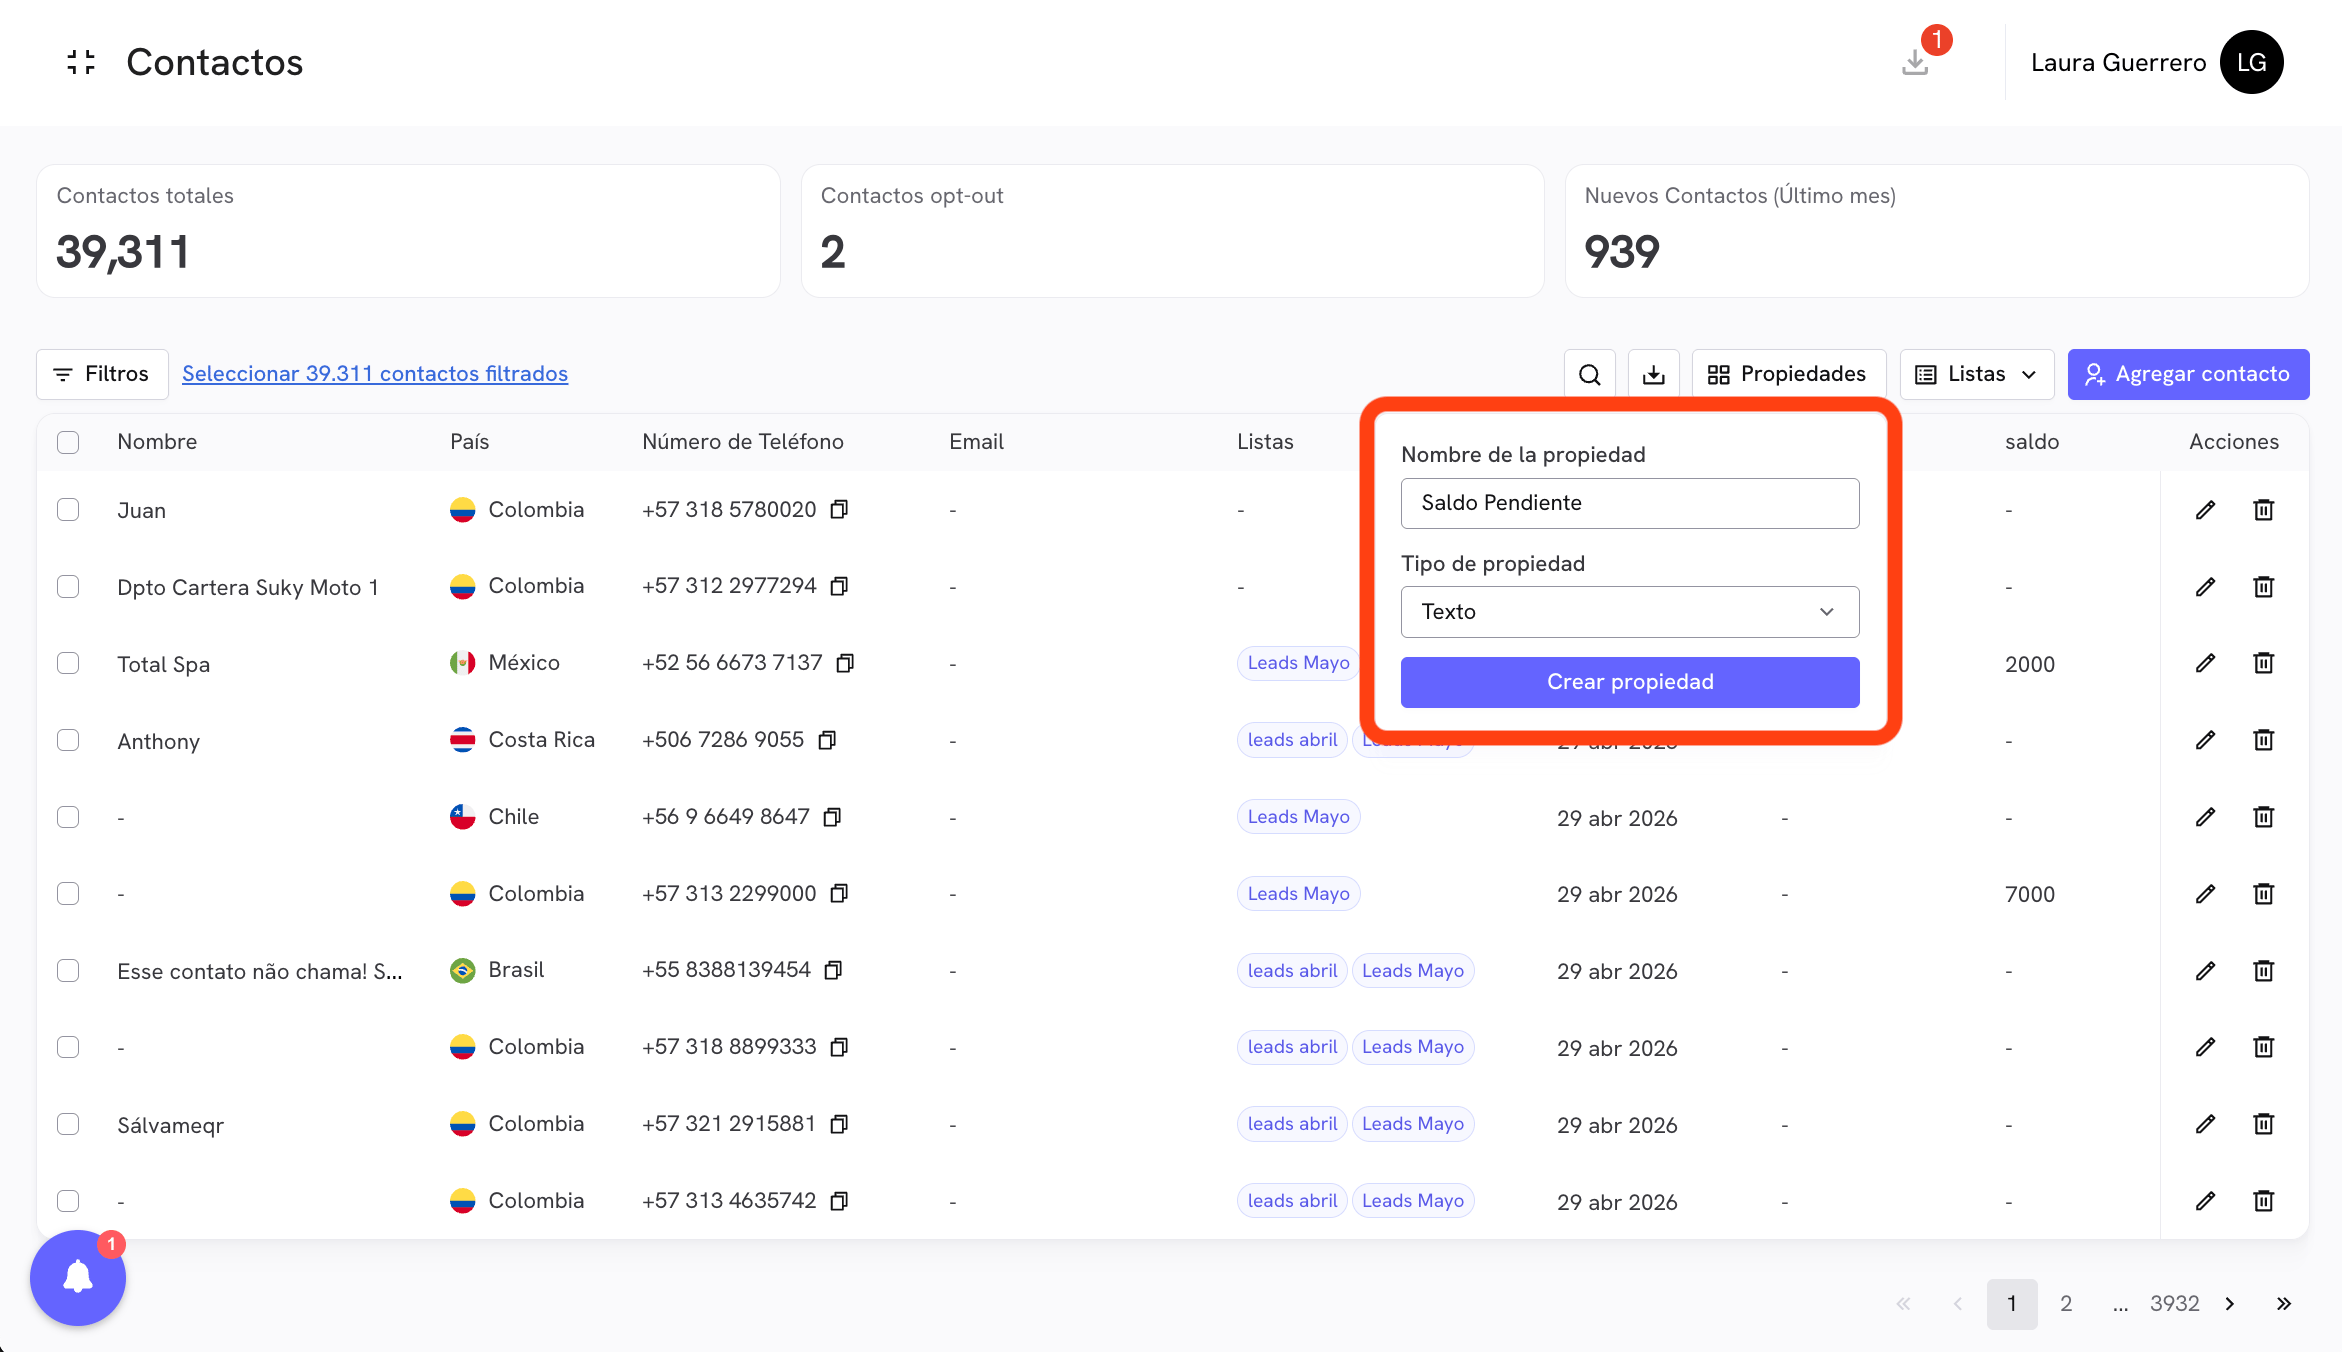 The available types are:
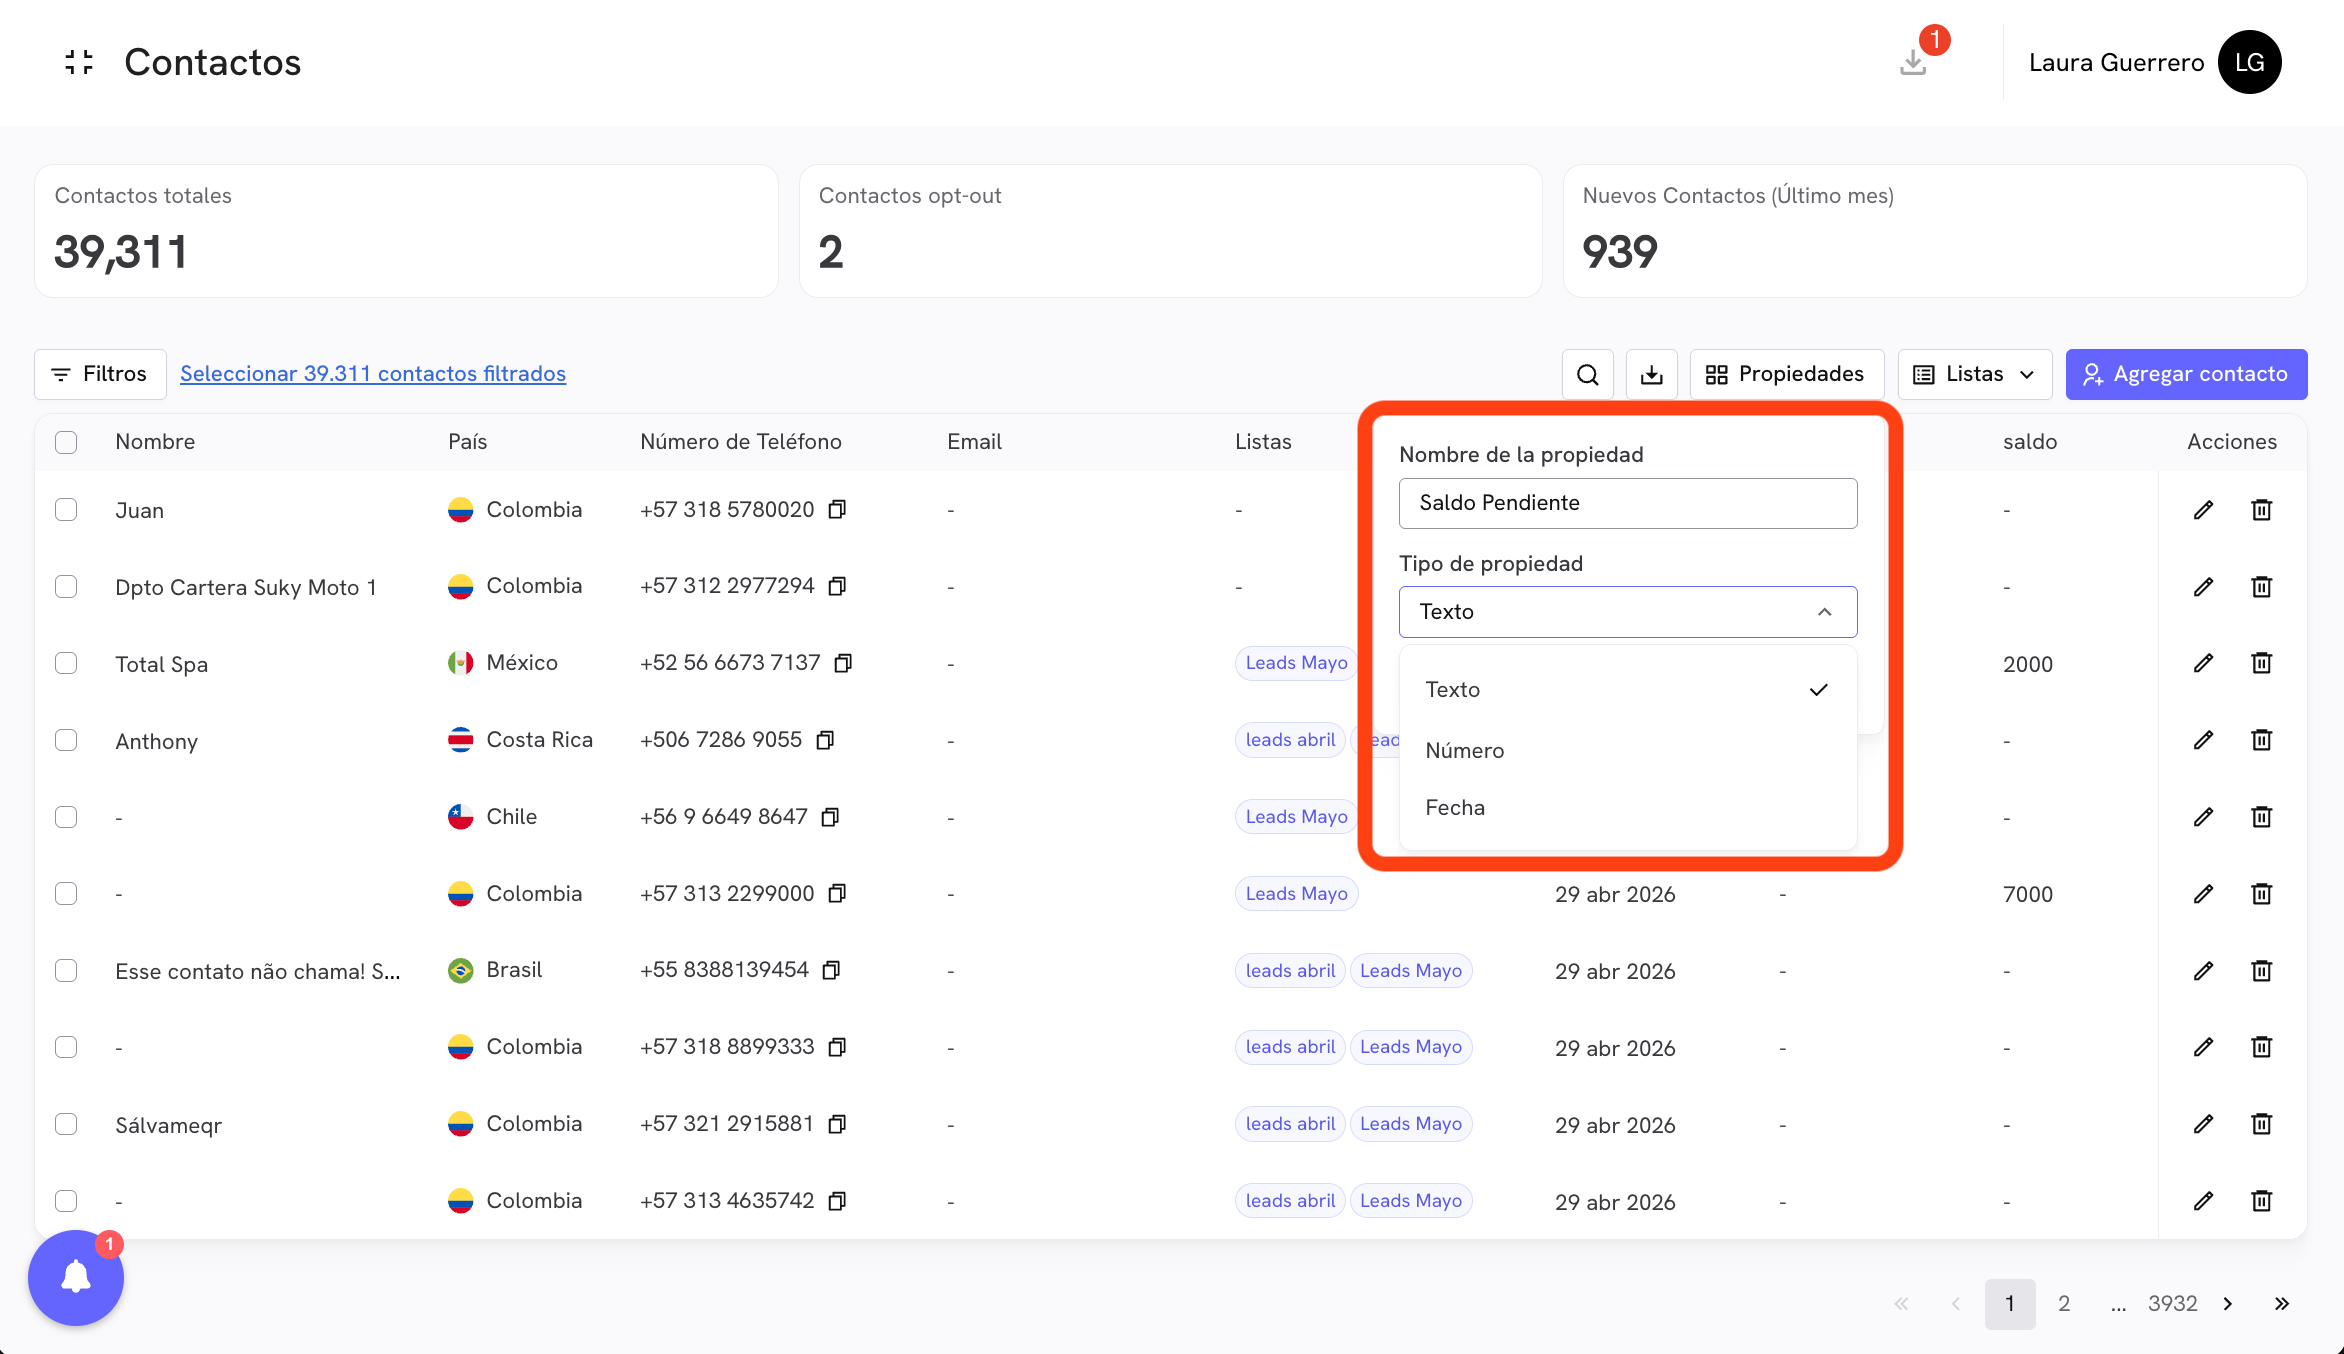 | Type | Description |
| ---------- | ------------------------------------------------------------------------------------ |
| **Text** | Stores any free-form text string. Ideal for fields like company, category, or notes. |
| **Number** | Stores numeric values. Ideal for balances, scores, or quantities. |
| **Date** | Stores dates. Ideal for last purchase, renewal, or expiration dates. |
Once created, the property appears as a column in the contacts table and as an available field when adding or editing contacts, when uploading CSVs, and when using variables in the conversation editor.
To view and manage all your properties, click **Properties → View custom properties**.
***
## Contact lists
Lists allow you to segment your contacts into named groups so you can filter them and send them conversations in a targeted way.
To create a list, click the **Lists** button in the toolbar, type the name of the new list, and click **Create list**.
| Type | Description |
| ---------- | ------------------------------------------------------------------------------------ |
| **Text** | Stores any free-form text string. Ideal for fields like company, category, or notes. |
| **Number** | Stores numeric values. Ideal for balances, scores, or quantities. |
| **Date** | Stores dates. Ideal for last purchase, renewal, or expiration dates. |
Once created, the property appears as a column in the contacts table and as an available field when adding or editing contacts, when uploading CSVs, and when using variables in the conversation editor.
To view and manage all your properties, click **Properties → View custom properties**.
***
## Contact lists
Lists allow you to segment your contacts into named groups so you can filter them and send them conversations in a targeted way.
To create a list, click the **Lists** button in the toolbar, type the name of the new list, and click **Create list**.
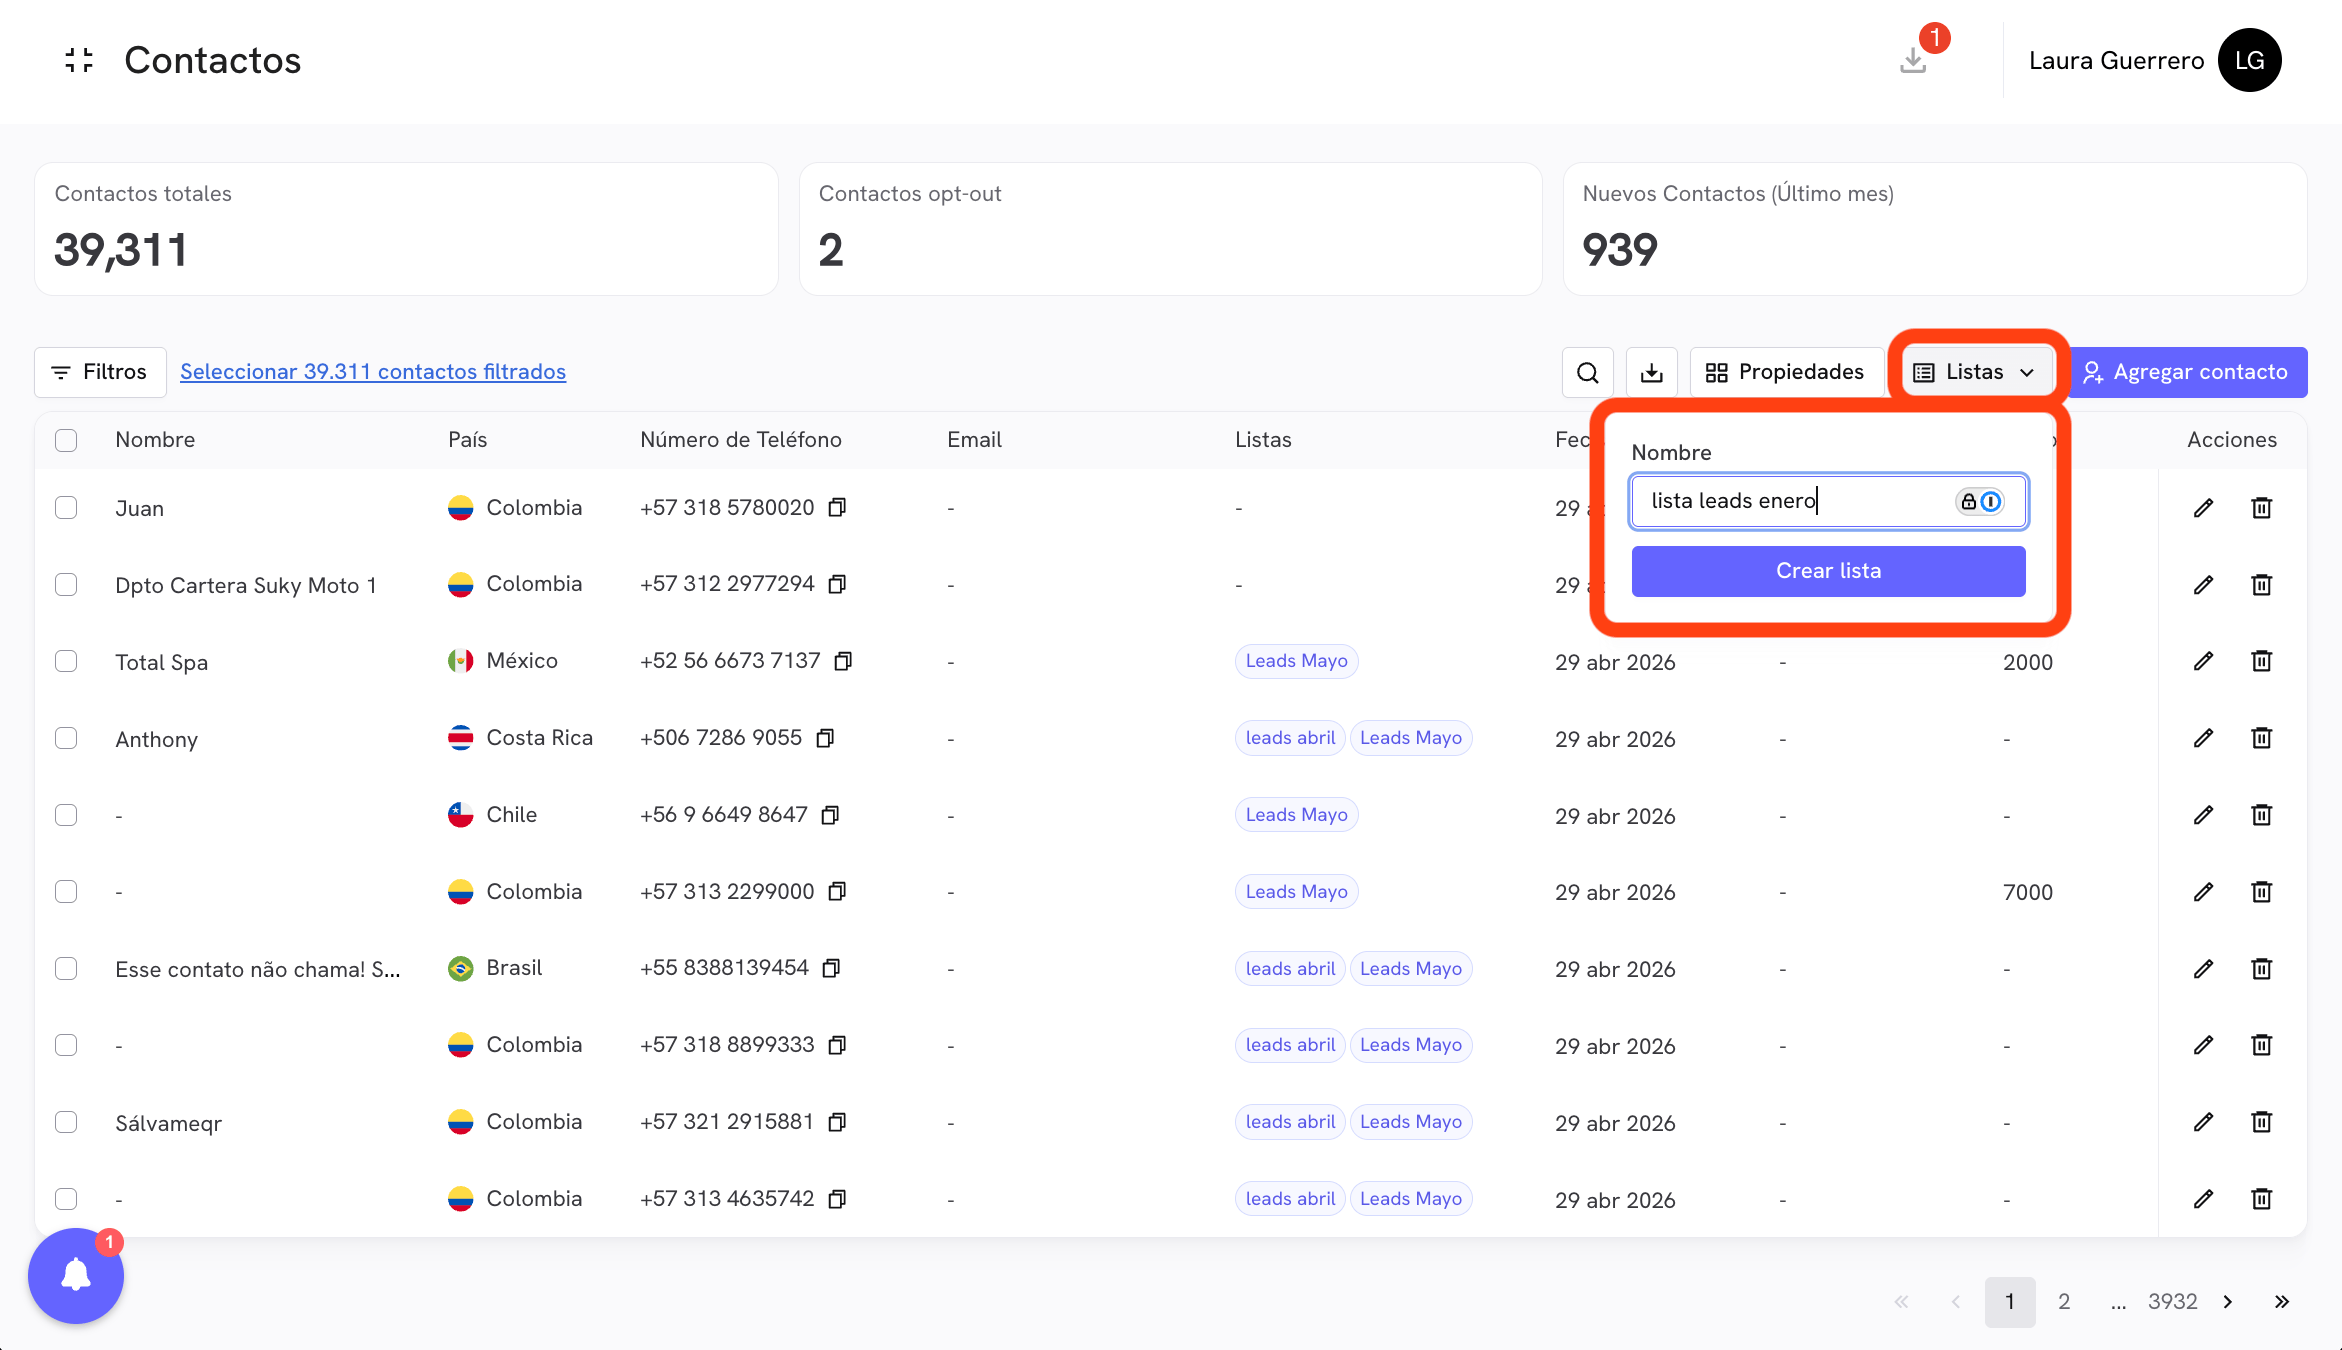 The lists you create will appear:
* As a column in the contacts table, showing which lists each contact belongs to.
* As an available filter in the **Filters** panel.
* As an option when executing **Add to list** or **Remove from list** bulk actions.
***
## Toolbar
The lists you create will appear:
* As a column in the contacts table, showing which lists each contact belongs to.
* As an available filter in the **Filters** panel.
* As an option when executing **Add to list** or **Remove from list** bulk actions.
***
## Toolbar
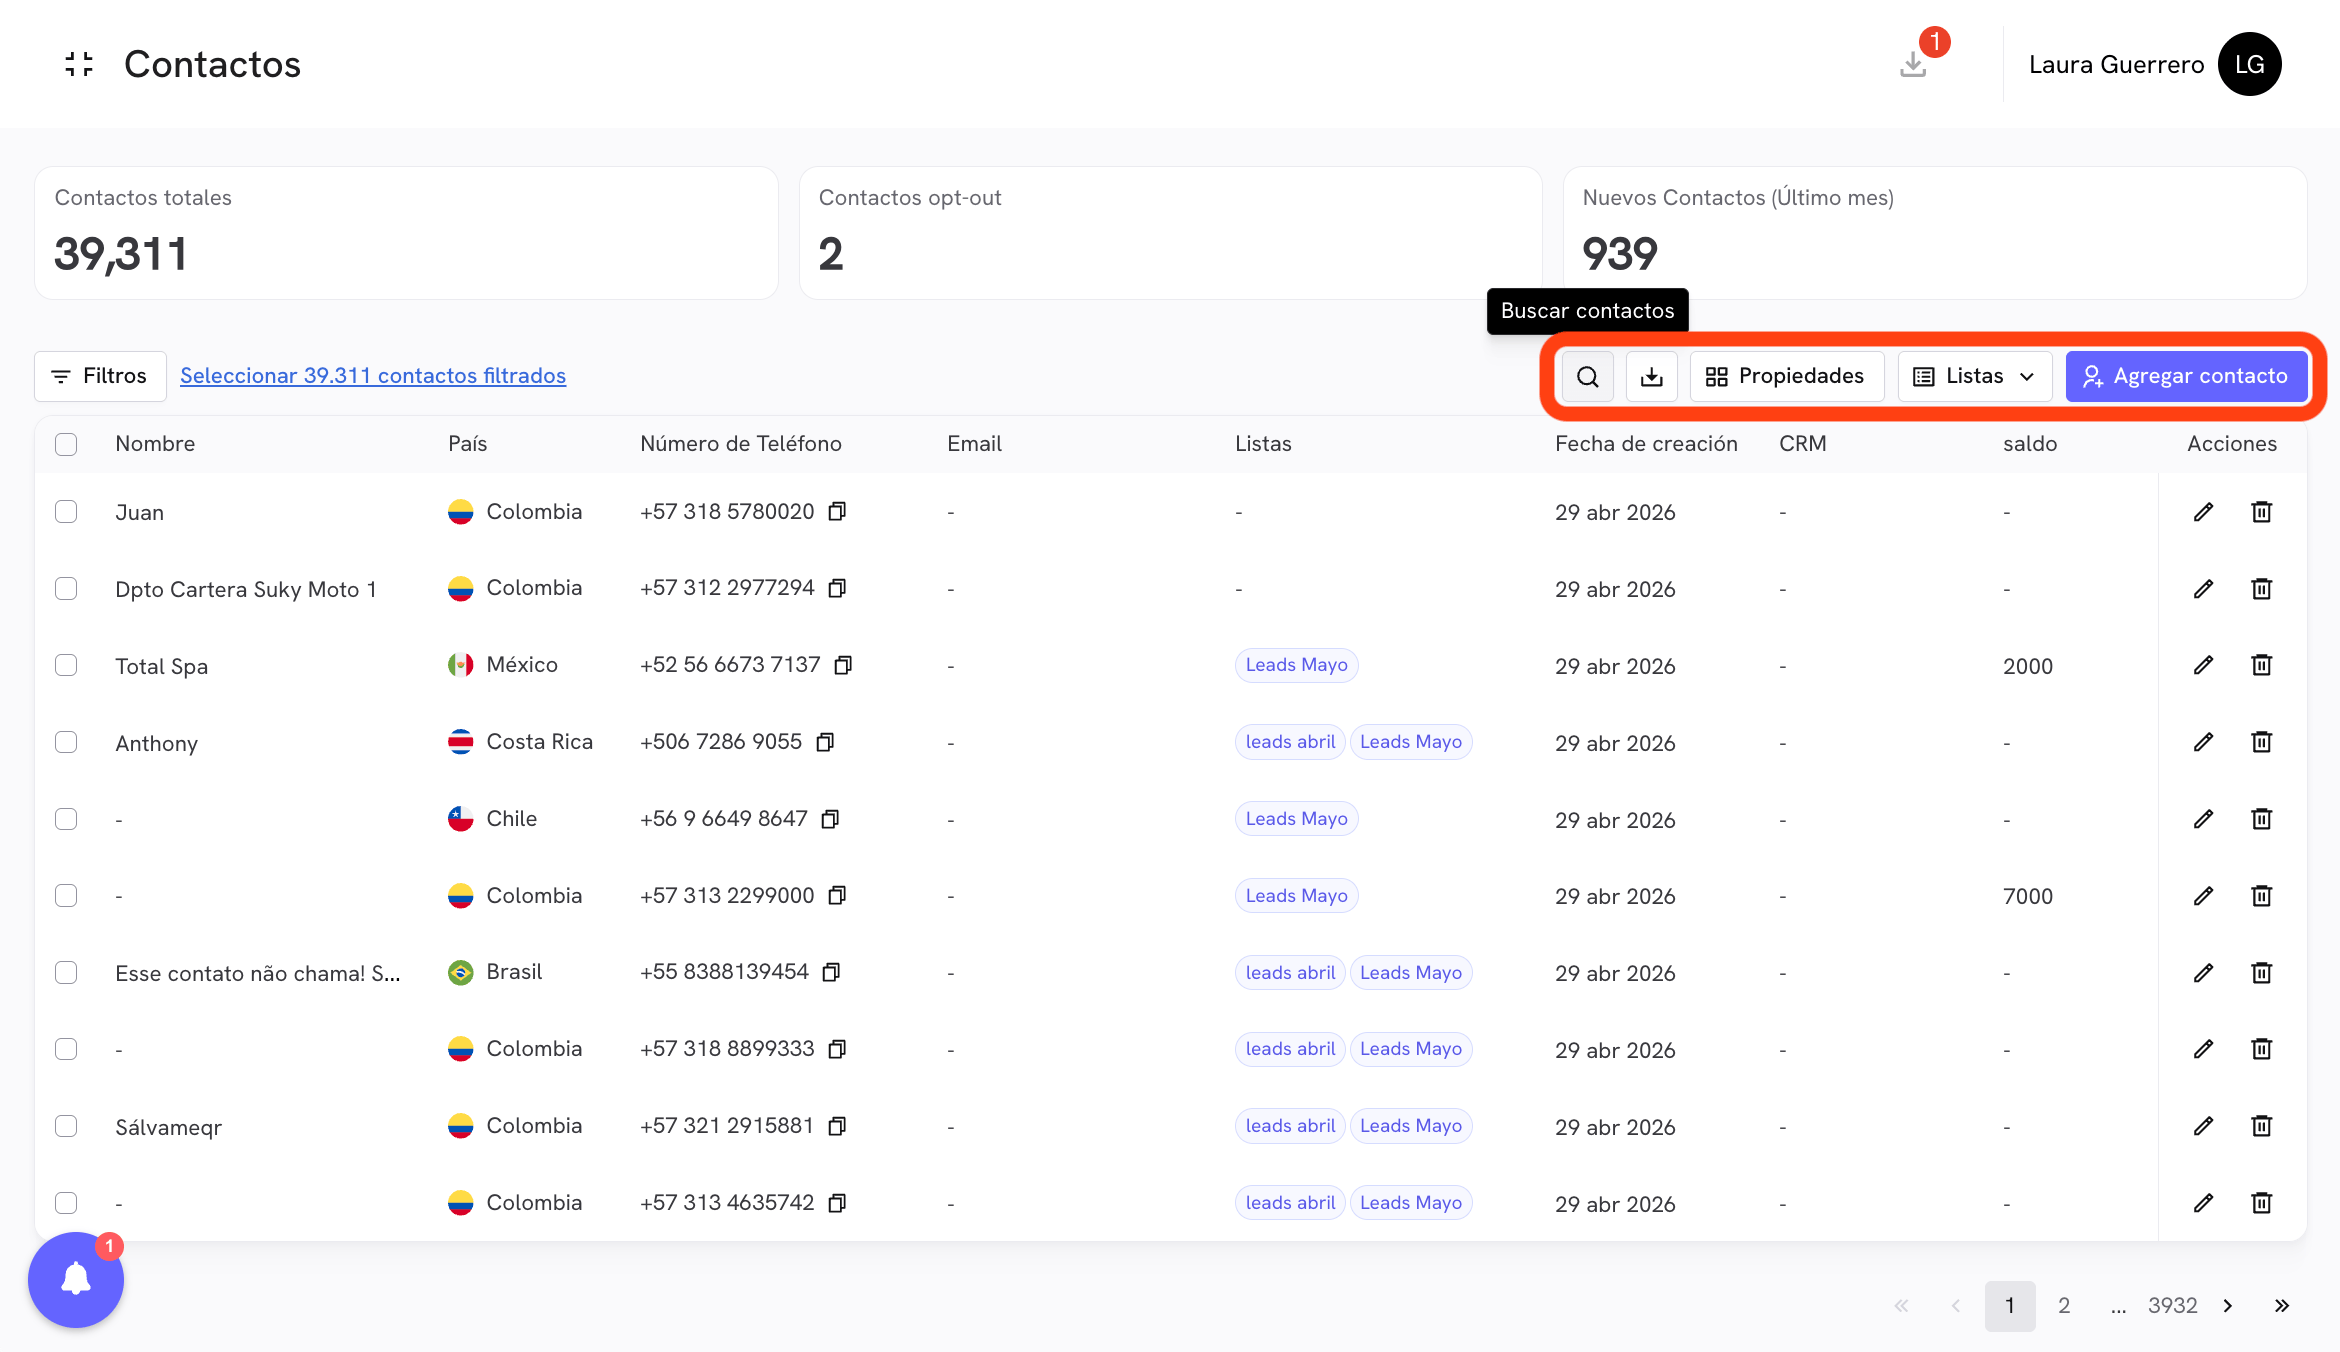 The toolbar, located in the top right of the table, contains the following actions:
| Action | Description |
| ------------------------------------------------------------ | ---------------------------------------------------- |
|
The toolbar, located in the top right of the table, contains the following actions:
| Action | Description |
| ------------------------------------------------------------ | ---------------------------------------------------- |
| 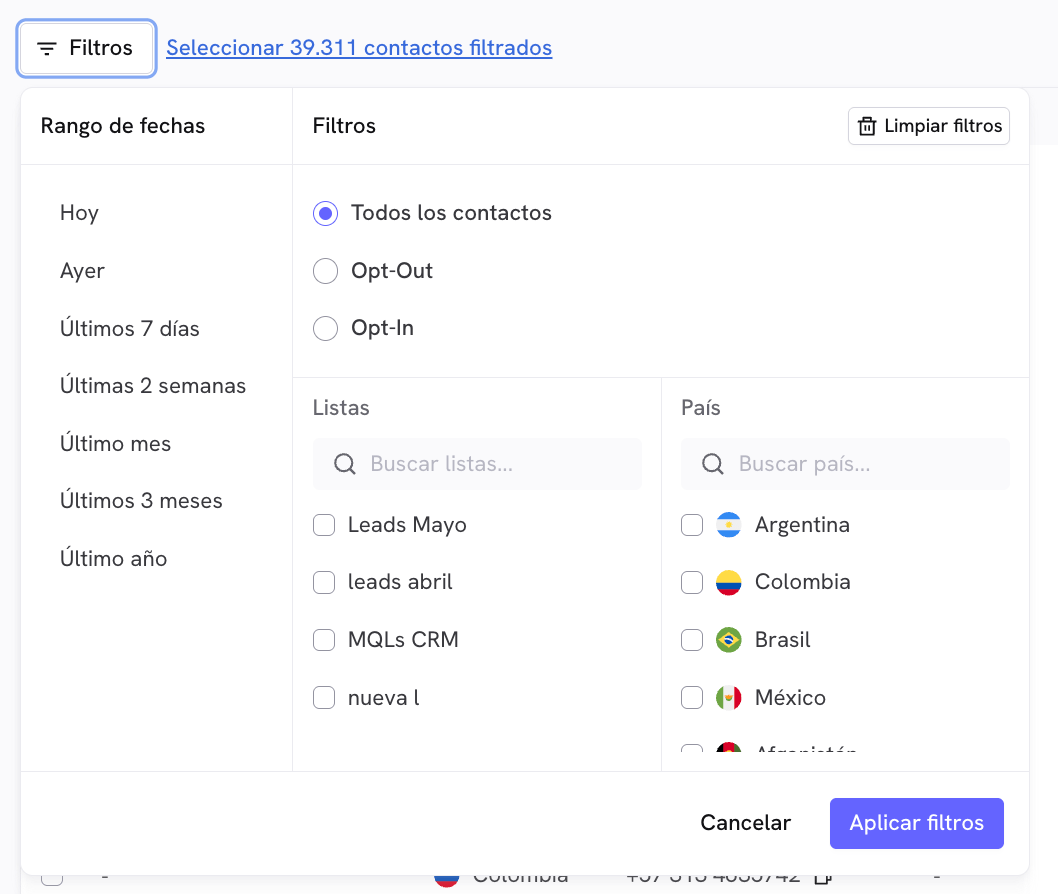 The available filters are:
| Filter | Options |
| -------------- | -------------------------------------------------------------------------------------------------------------------- |
| **Date range** | Today, Yesterday, Last 7 days, Last 2 weeks, Last month, Last 3 months, Last year. Filters by contact creation date. |
| **Status** | All contacts, Opt-Out, Opt-In. |
| **Lists** | Shows only contacts that belong to one or more selected lists. |
| **Country** | Filters by the phone number's country code. |
Once the filters are configured, click **Apply filters**. The table will update and the header will show a **Select \[N] filtered contacts** link that lets you select all contacts that meet the criteria, regardless of the page.
***
## Bulk actions
With one or more contacts selected, a bar appears at the bottom of the screen with the available bulk actions.
The available filters are:
| Filter | Options |
| -------------- | -------------------------------------------------------------------------------------------------------------------- |
| **Date range** | Today, Yesterday, Last 7 days, Last 2 weeks, Last month, Last 3 months, Last year. Filters by contact creation date. |
| **Status** | All contacts, Opt-Out, Opt-In. |
| **Lists** | Shows only contacts that belong to one or more selected lists. |
| **Country** | Filters by the phone number's country code. |
Once the filters are configured, click **Apply filters**. The table will update and the header will show a **Select \[N] filtered contacts** link that lets you select all contacts that meet the criteria, regardless of the page.
***
## Bulk actions
With one or more contacts selected, a bar appears at the bottom of the screen with the available bulk actions.
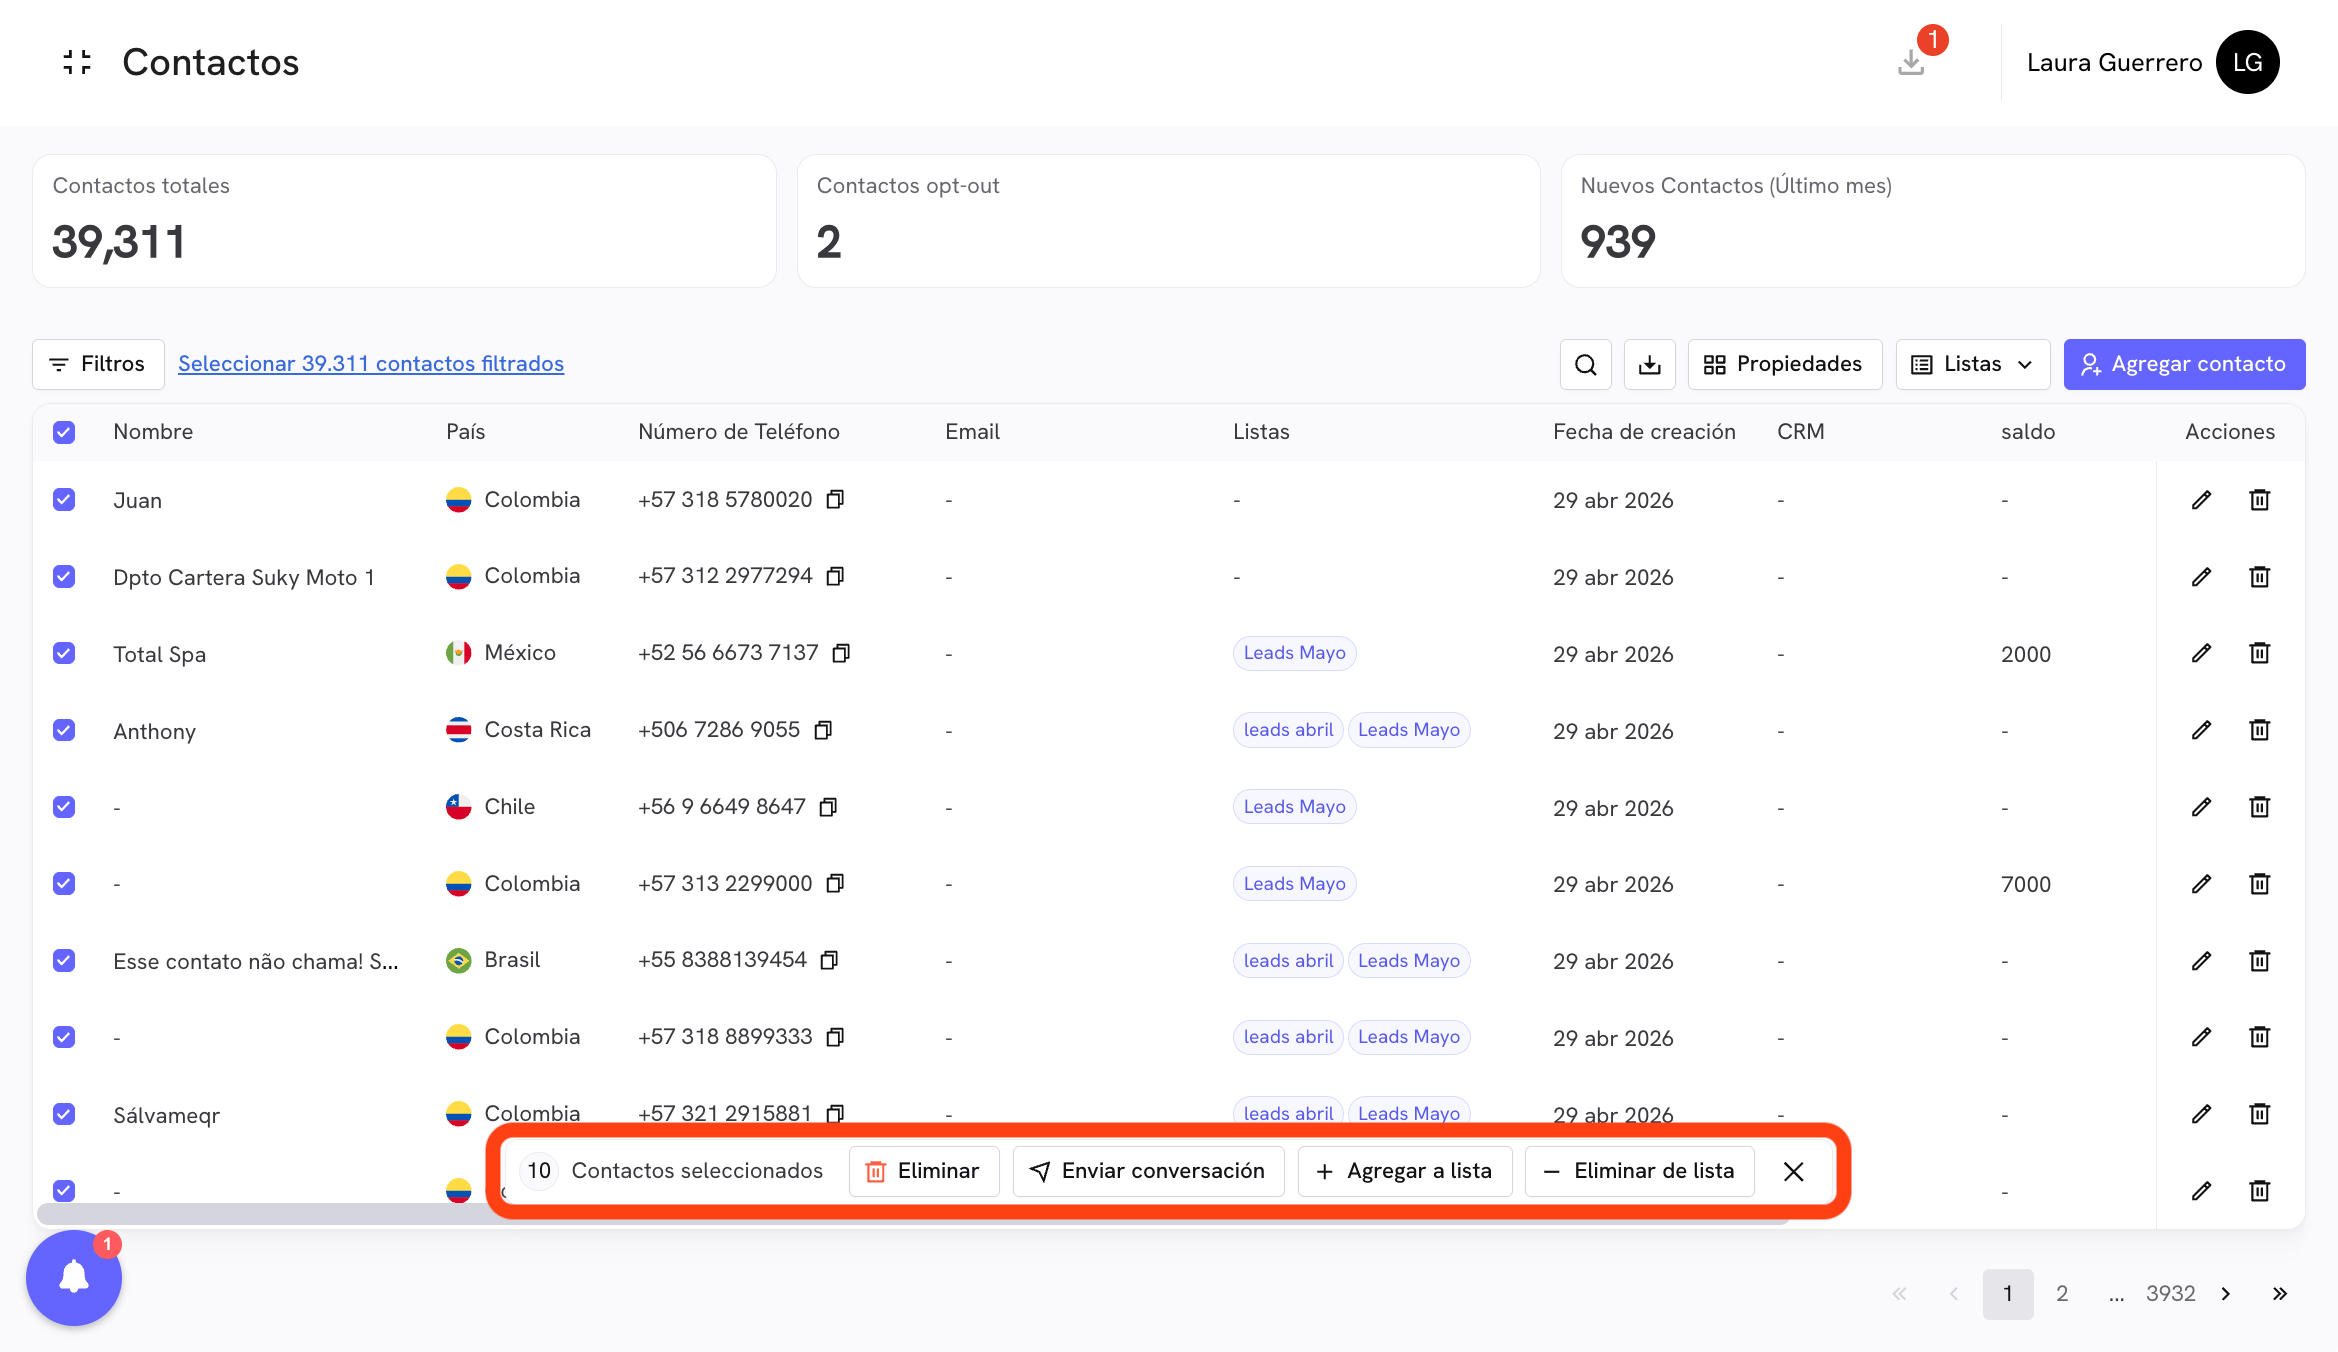 You can select contacts in three ways:
* **Individually**: check the box next to each contact.
* **Current page**: check the header checkbox to select all contacts on the visible page.
* **All filtered**: click the **Select \[N] filtered contacts** link in the top bar to select all contacts that pass the active filters, even if there are thousands.
The available actions are:
### 🗑 Delete
Permanently deletes the selected contacts from your account.
### ➕ Add to list
Adds the selected contacts to an existing list. When you click, a search box appears with your available lists. Select the destination list and click **Add**.
You can select contacts in three ways:
* **Individually**: check the box next to each contact.
* **Current page**: check the header checkbox to select all contacts on the visible page.
* **All filtered**: click the **Select \[N] filtered contacts** link in the top bar to select all contacts that pass the active filters, even if there are thousands.
The available actions are:
### 🗑 Delete
Permanently deletes the selected contacts from your account.
### ➕ Add to list
Adds the selected contacts to an existing list. When you click, a search box appears with your available lists. Select the destination list and click **Add**.
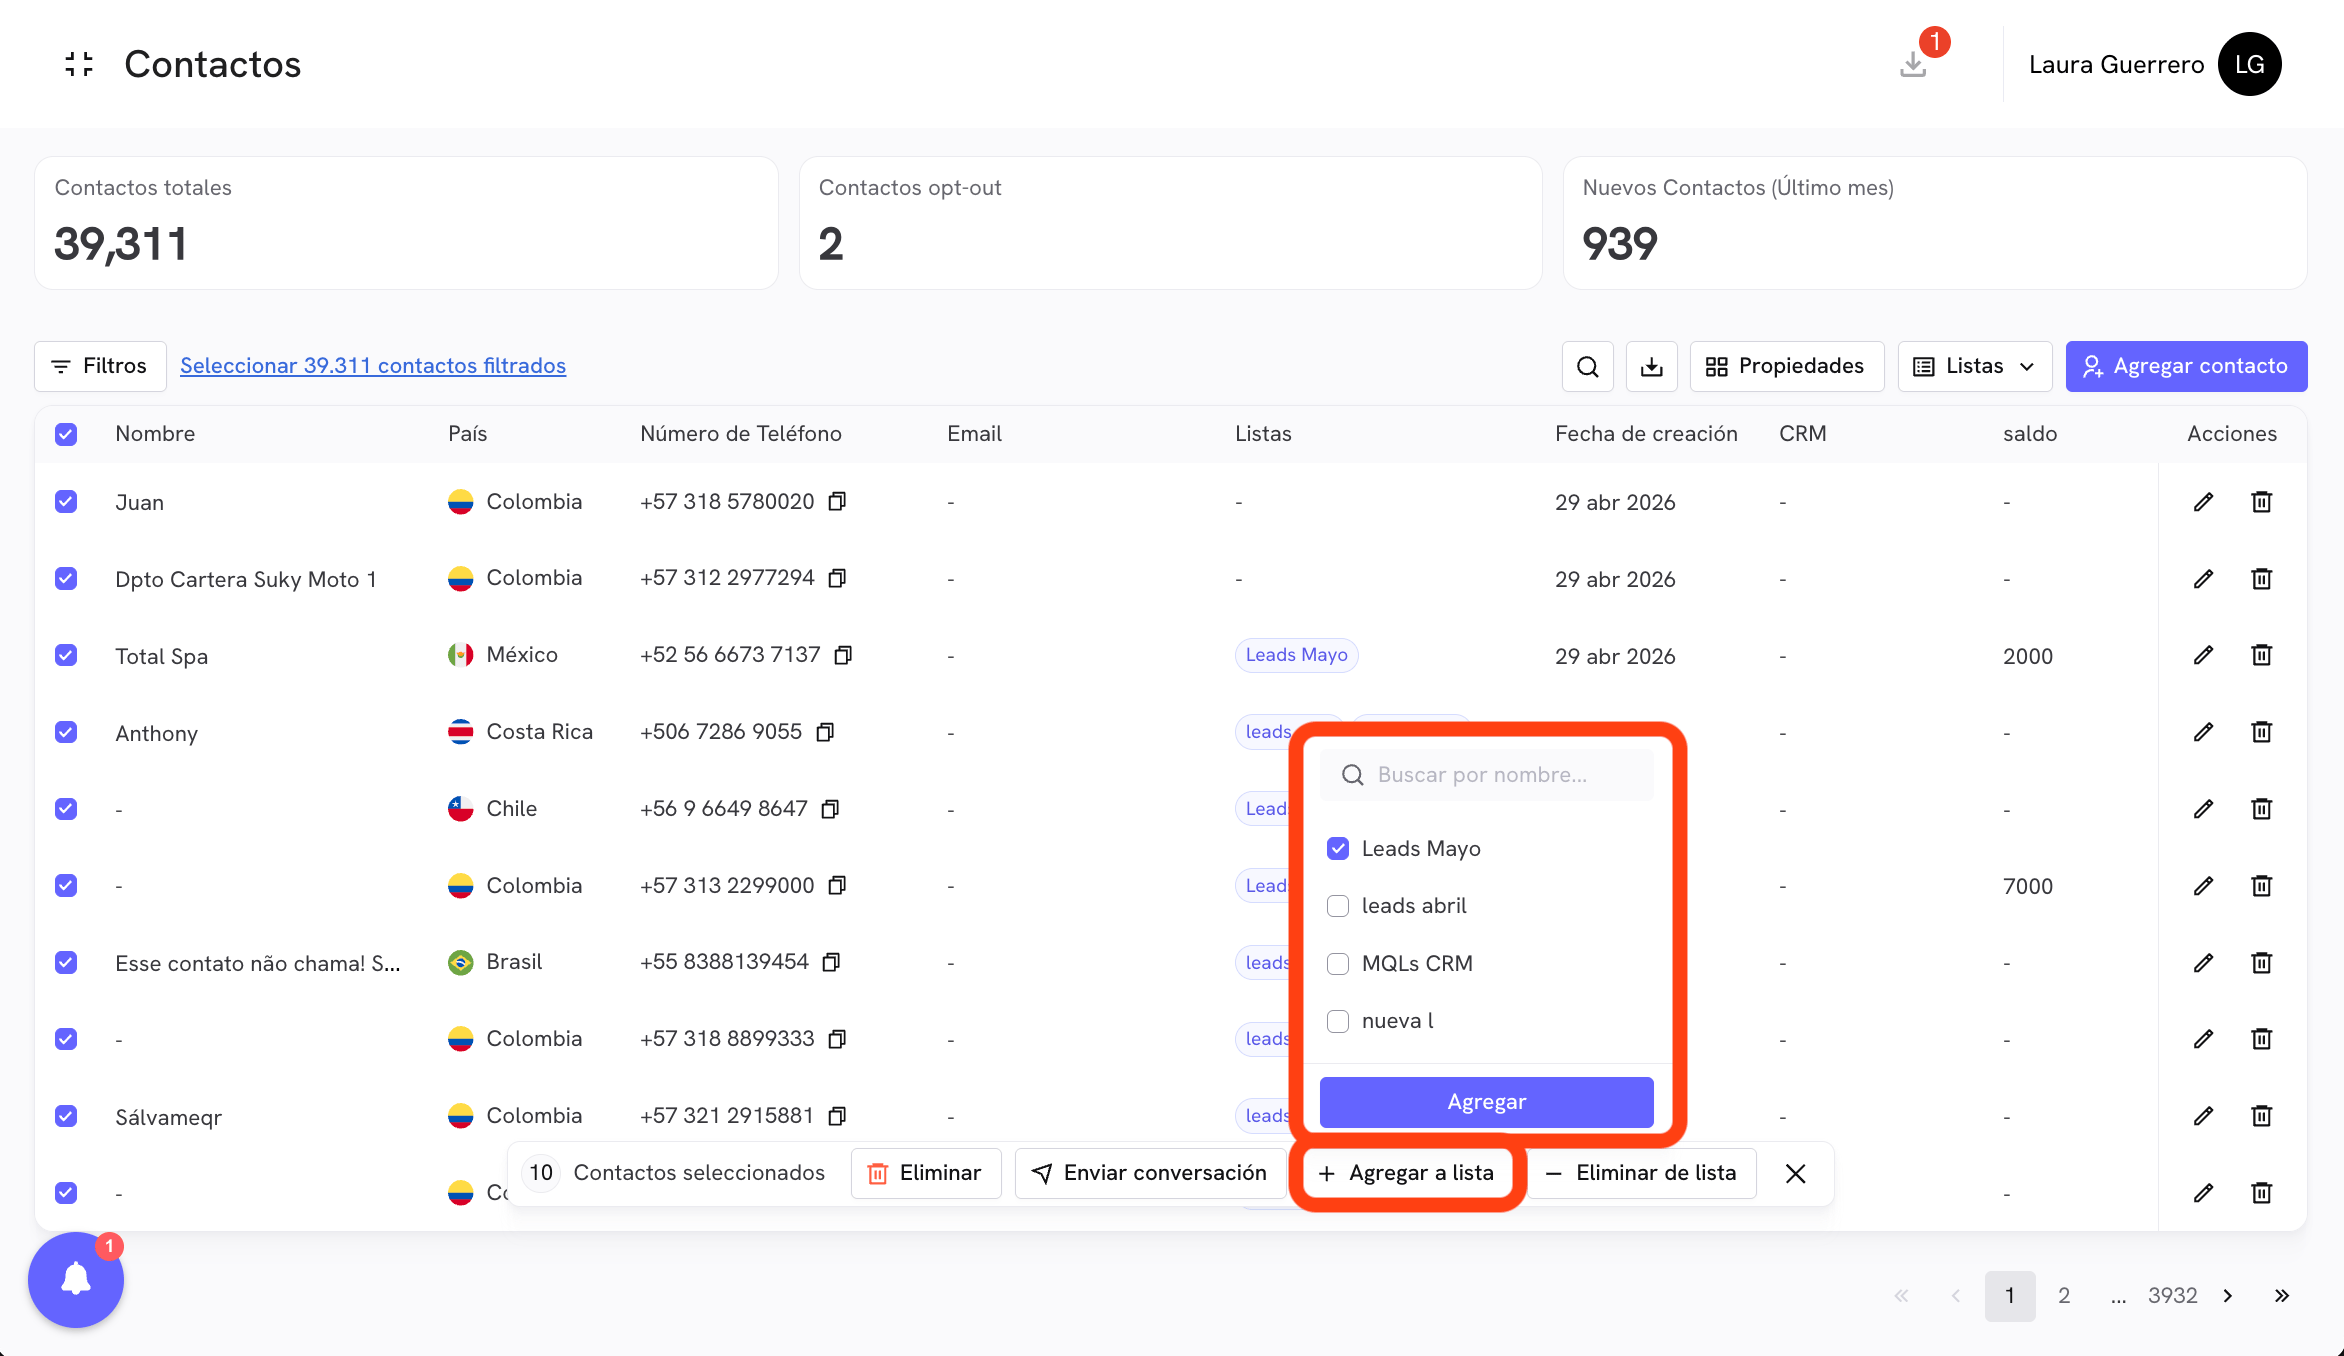 ### — Remove from list
Removes the selected contacts from a list. Useful for cleaning up segments without deleting the contacts from your base.
### 📤 Send conversation
Deploys a Treble conversation to the selected contacts directly from the Contacts section. When you click, a conversation search box opens so you can choose which one to send.
### — Remove from list
Removes the selected contacts from a list. Useful for cleaning up segments without deleting the contacts from your base.
### 📤 Send conversation
Deploys a Treble conversation to the selected contacts directly from the Contacts section. When you click, a conversation search box opens so you can choose which one to send.
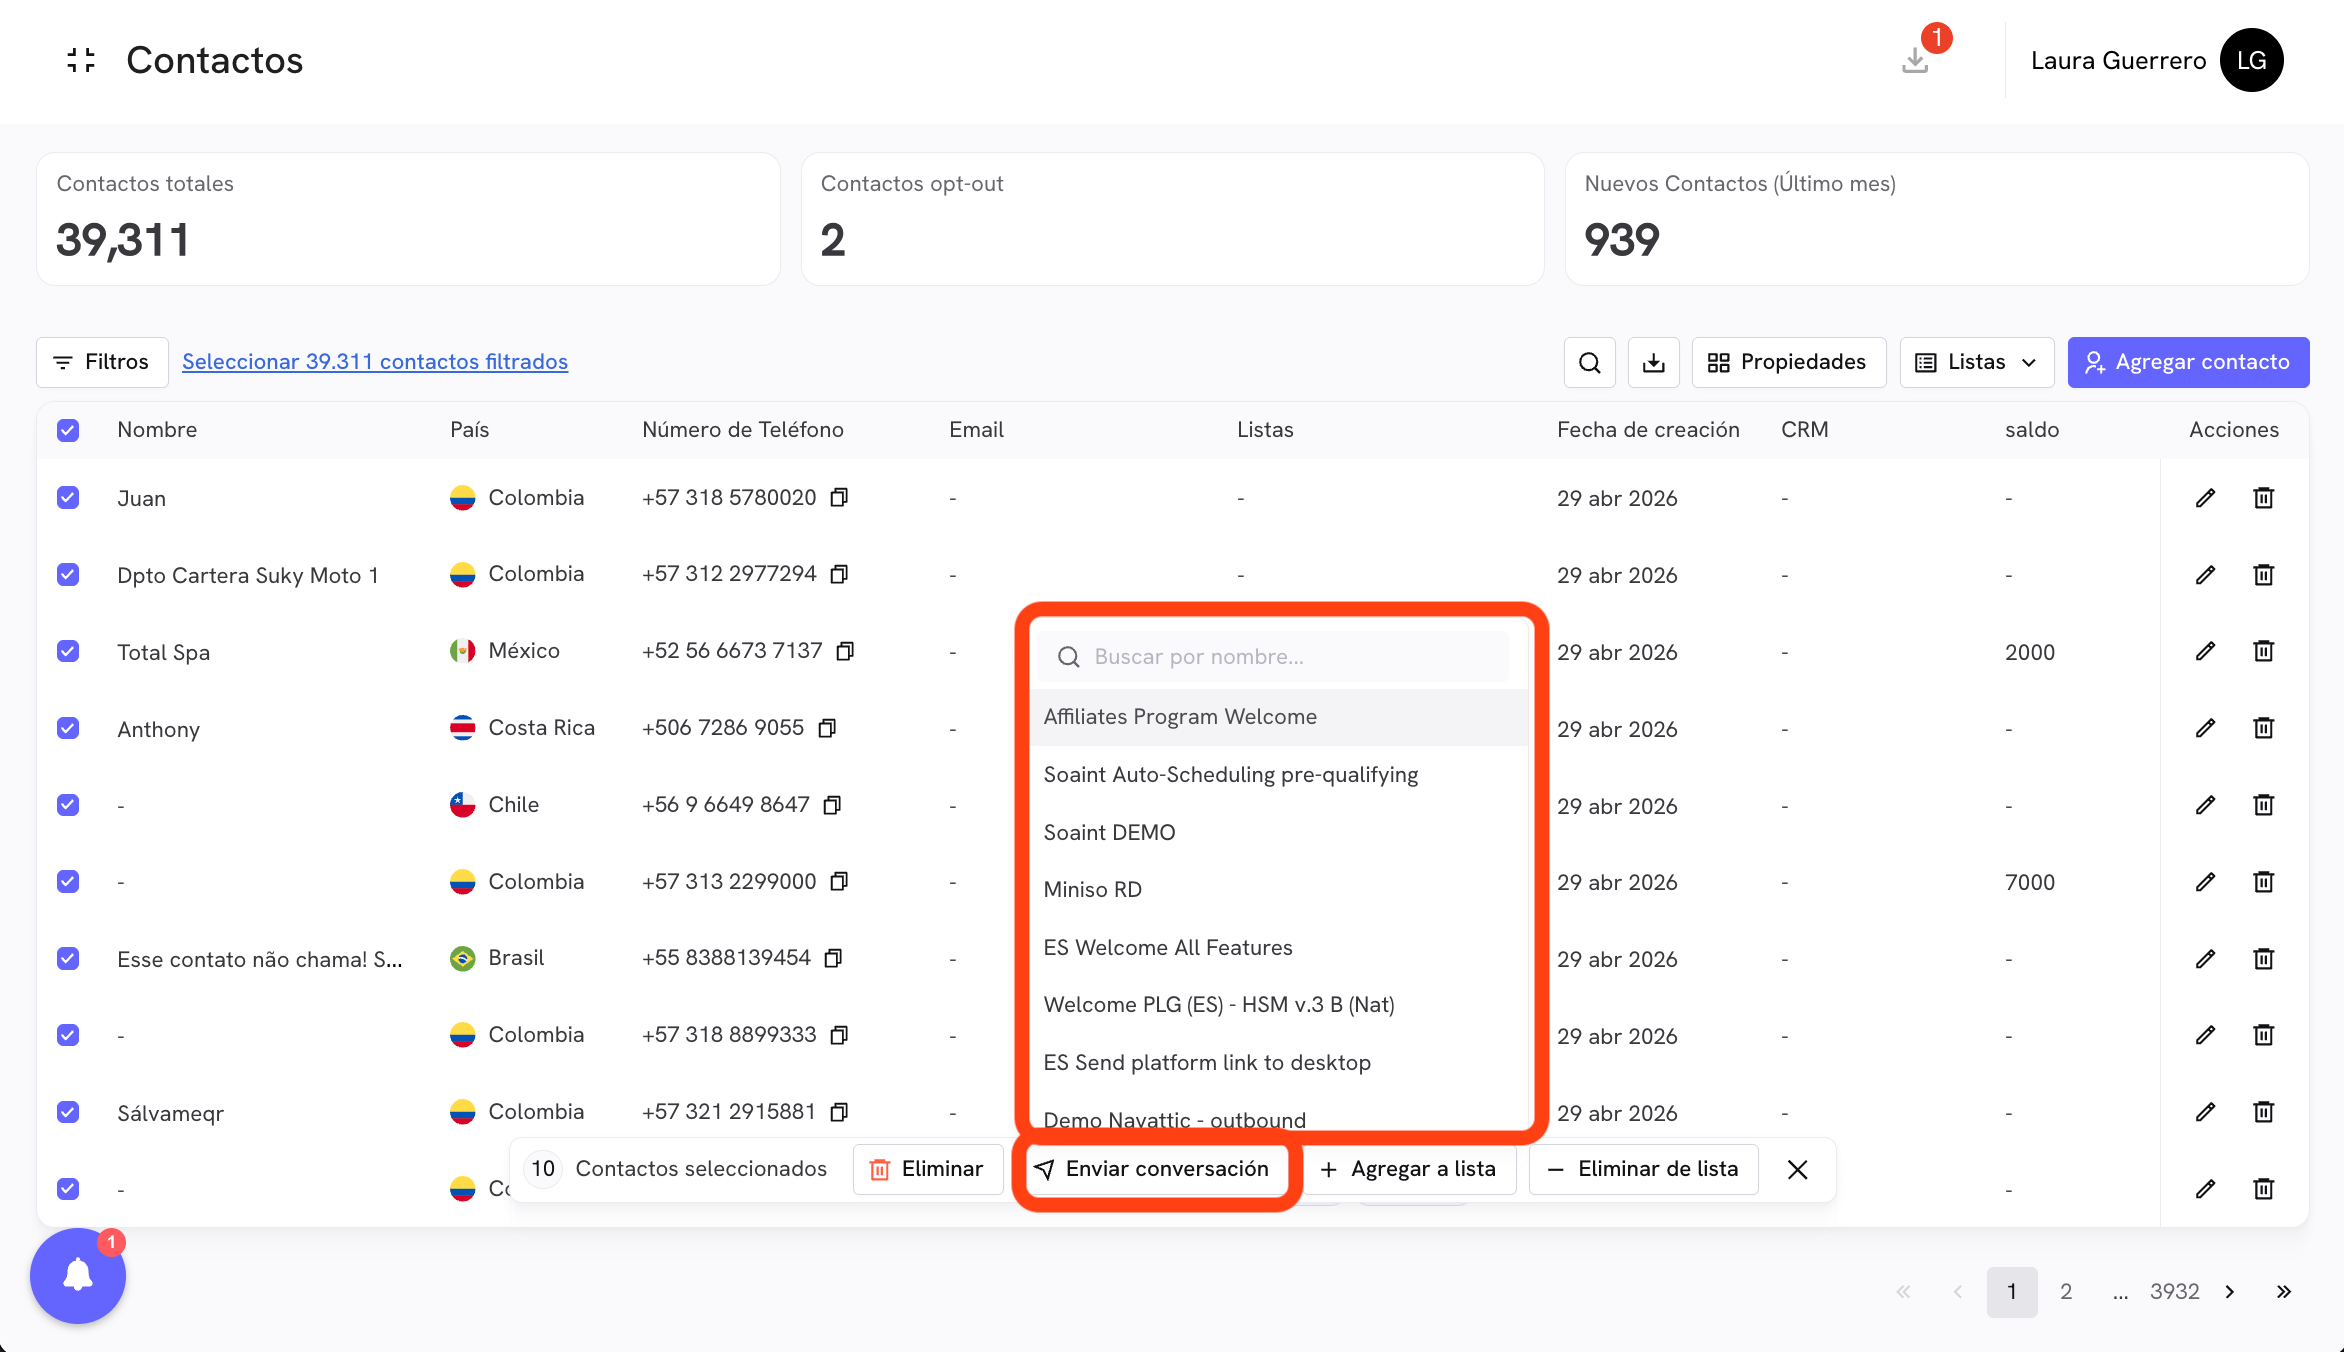 #### Link properties
If the selected conversation contains variables (for example, `{{name}}` or `{{company}}`), Treble will automatically check whether those variables match your contacts' properties. If there are variables that do not match, the **Link properties** modal will appear.
#### Link properties
If the selected conversation contains variables (for example, `{{name}}` or `{{company}}`), Treble will automatically check whether those variables match your contacts' properties. If there are variables that do not match, the **Link properties** modal will appear.
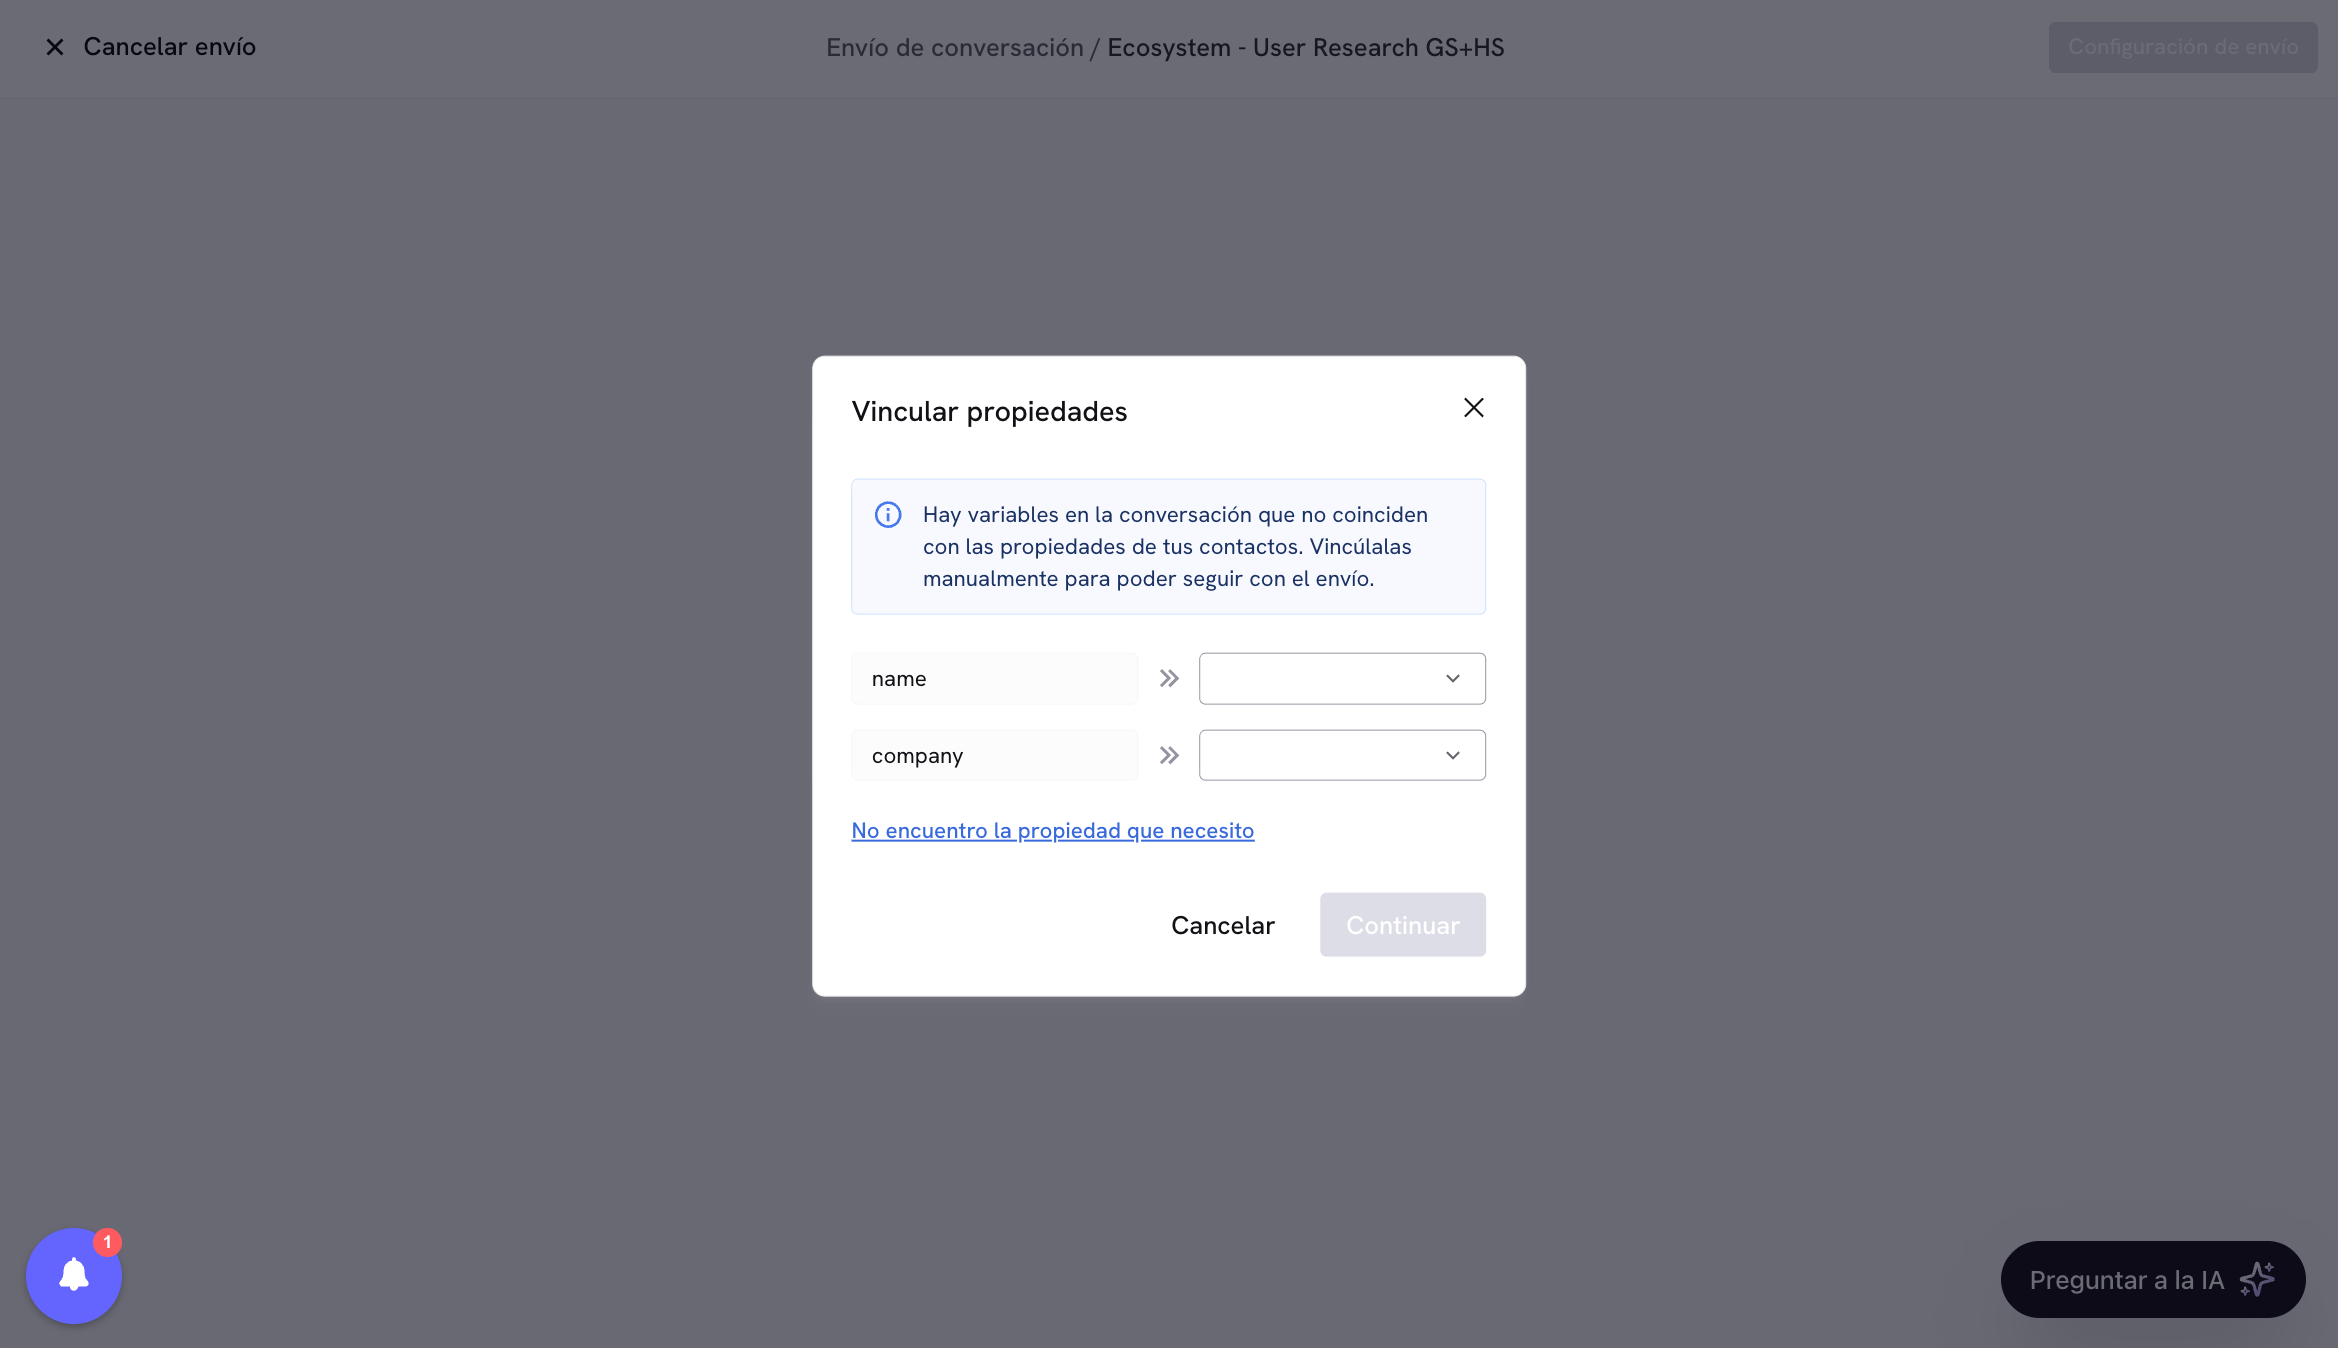 In this modal you can manually map each conversation variable to the contact property that should be used as its value. For example, the conversation's `name` variable can be mapped to the contact's `name` property.
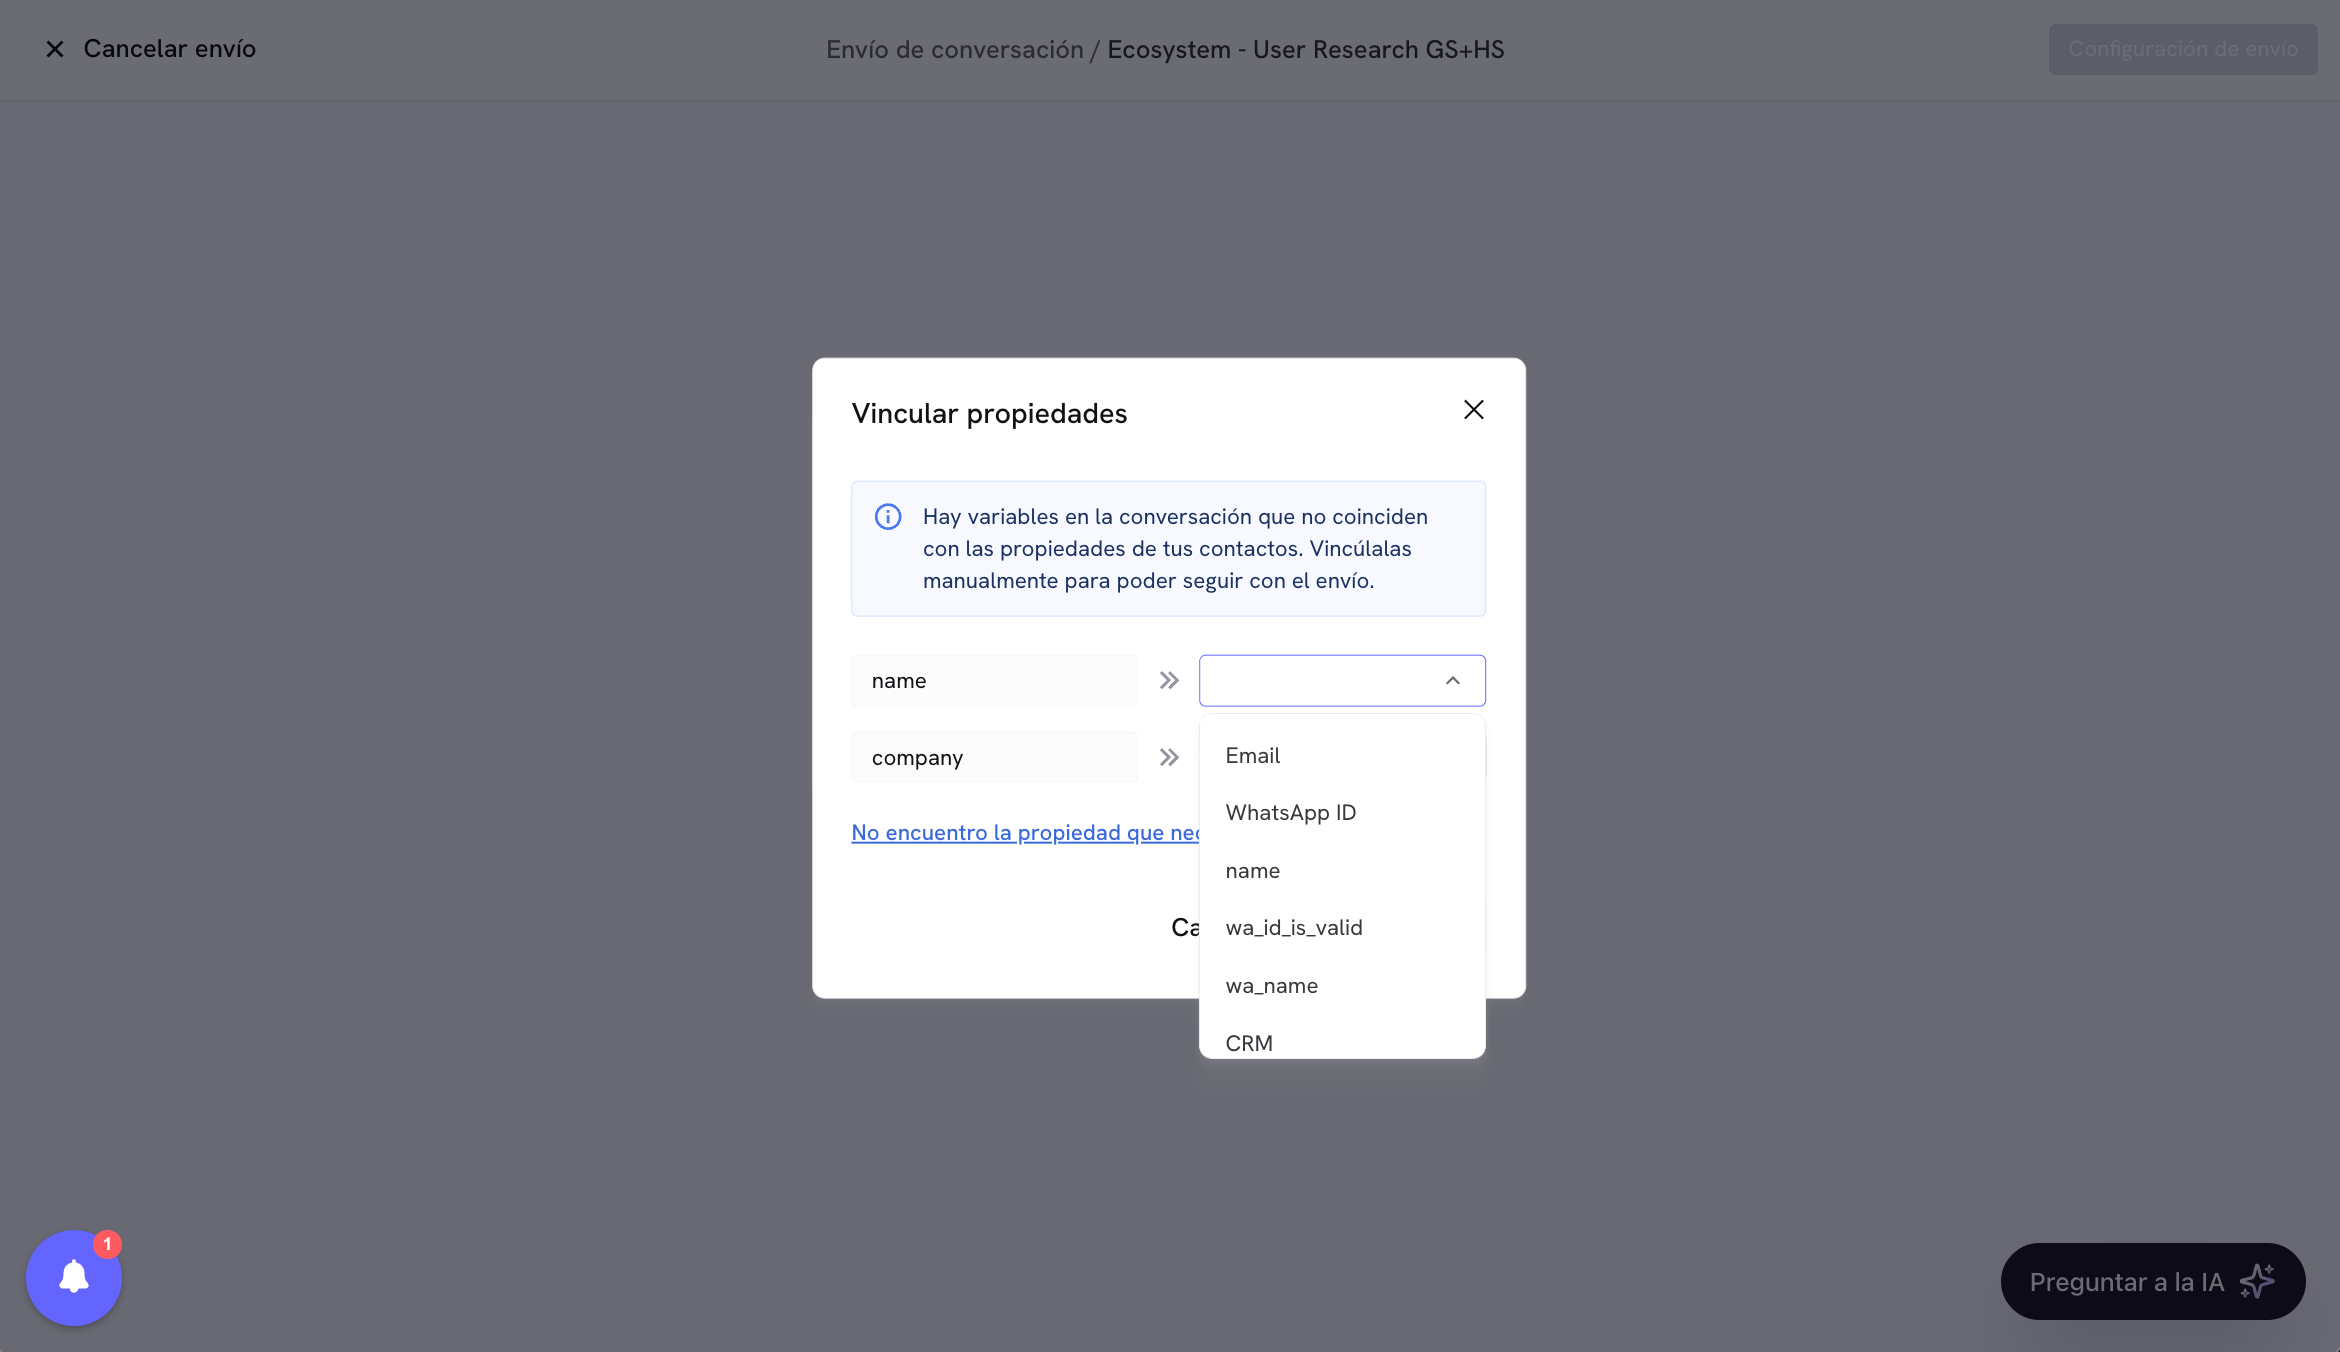 The properties available for linking include the base contact fields (Email, WhatsApp Id, name, etc.) and all the custom properties you have created.
HubSpot variables